Login
The Login page is the entry point to priint:suite applications. Depending on the server configuration, users may sign in using a local account (username and password) or through an external identity provider via Single Sign-On (SSO). Both paths lead through the same login window.
For information on how to configure authentication, realms, and available applications, see the AuthService Configuration article.
1 Login Window
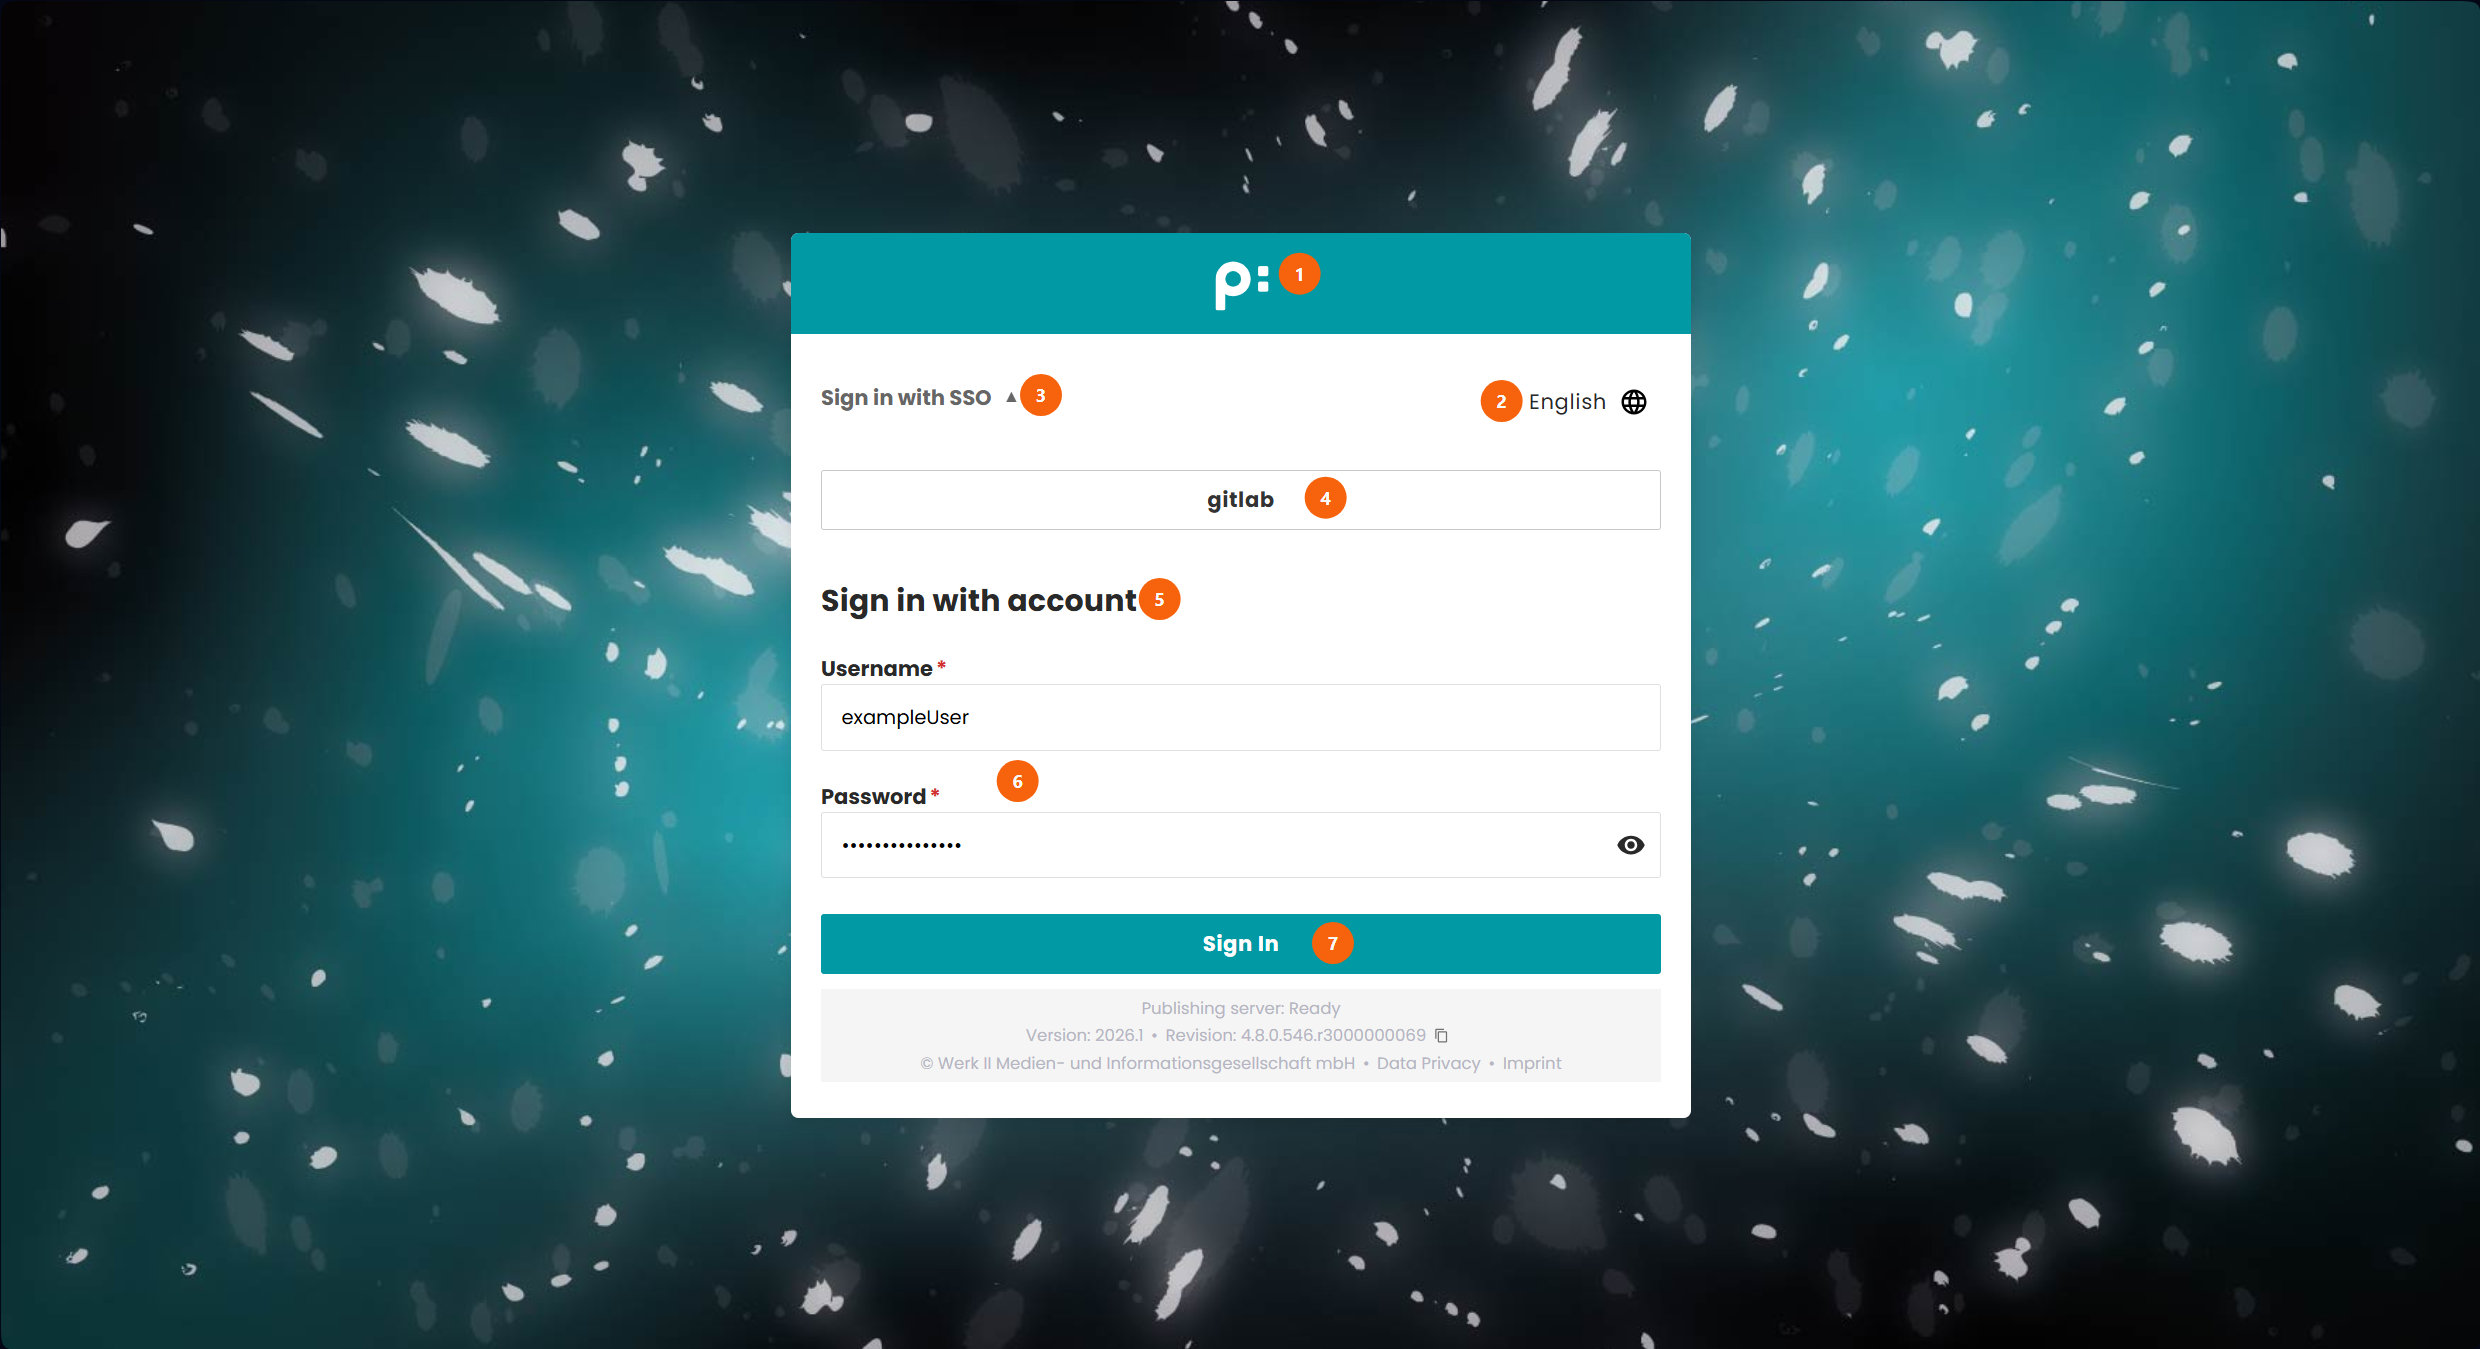
- The application logo (for the information about branding see Application Settings ).
- The language selector. Clicking it opens a dropdown that lets the user switch the interface language before signing in.
- The Sign in with SSO header (only visible when SSO realms are configured). Clicking it expands or collapses the list of SSO provider buttons.
- One button per configured SSO realm. Clicking a button redirects the user to the corresponding external identity provider to complete authentication.
- The Sign in with account button reveals the local account form (only visible when SSO realms are configured and the local form is not yet shown).
- The username and password fields for local account sign-in.
- The Sign in button submits the local credentials.
2 Signing in with a Local Account
When no SSO realms are configured, the login window shows the local account form directly. When realms are configured, the local form is hidden by default and can be revealed by clicking Sign in with account.
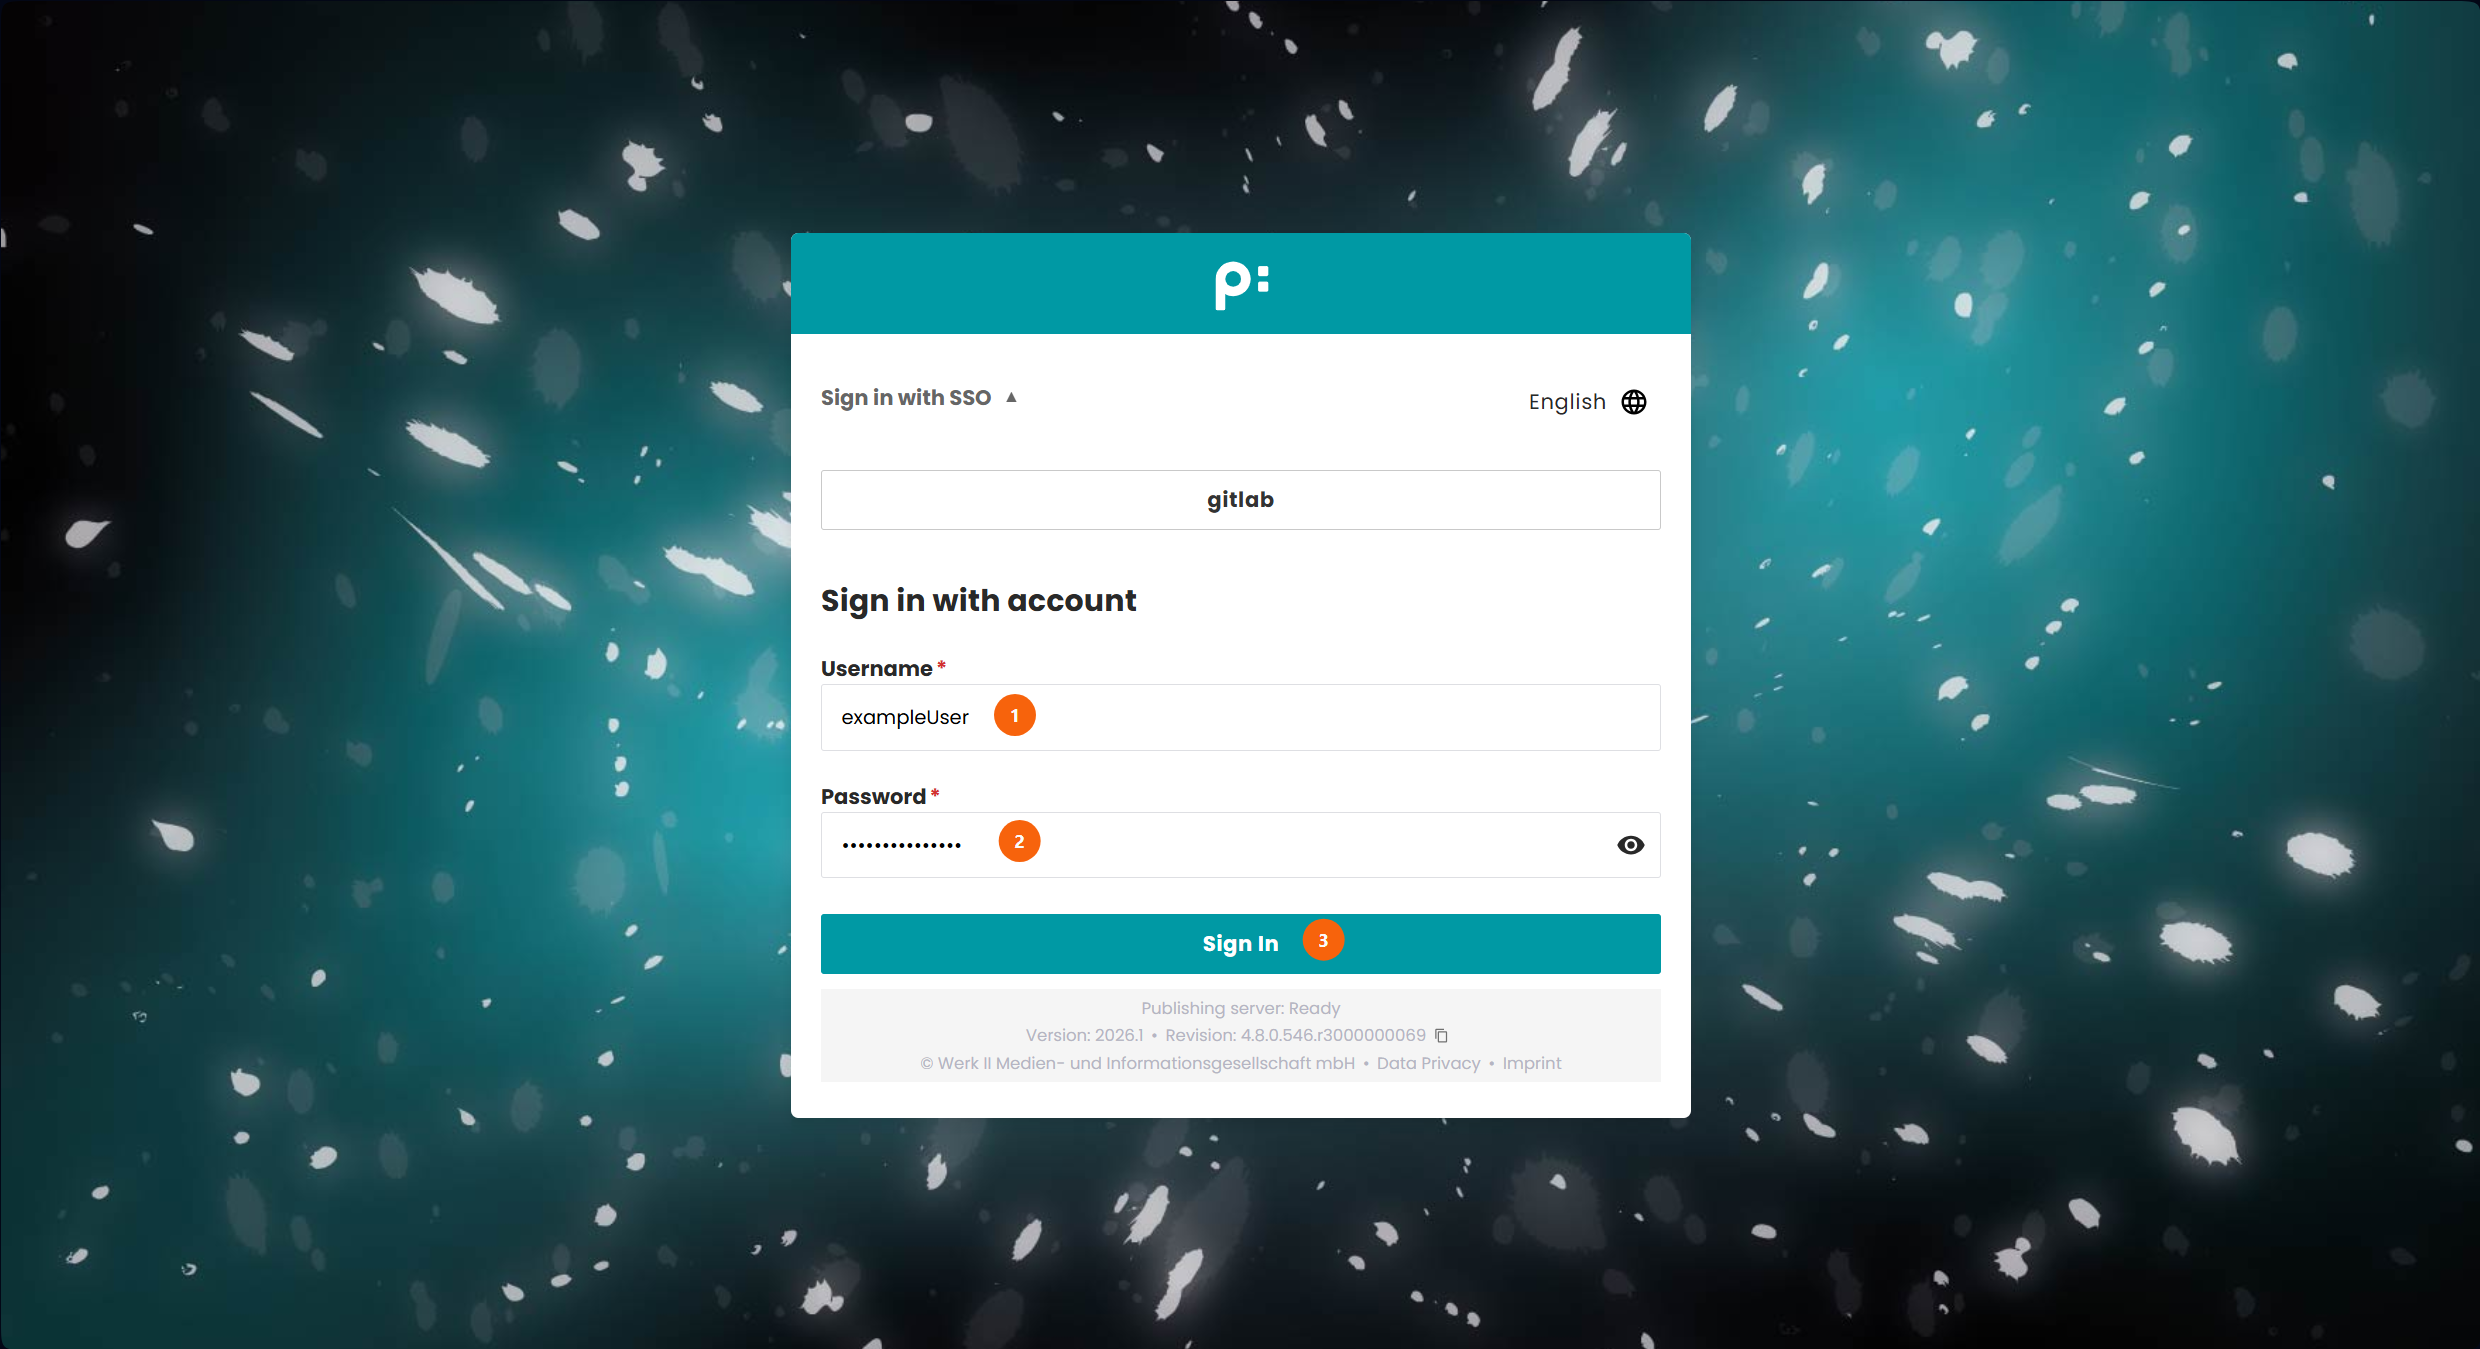
To sign in with a local account:
- Enter the username in the Login field.
- Enter the password in the Password field.
- Click Sign in.
If the credentials are incorrect, the input fields are highlighted and an error message is displayed. Correct the values and try again.
3 Signing in with Single Sign-On (SSO)
When SSO realms are configured by the administrator, a Sign in with SSO section appears at the top of the login form. The section can be expanded or collapsed by clicking the Sign in with SSO header.
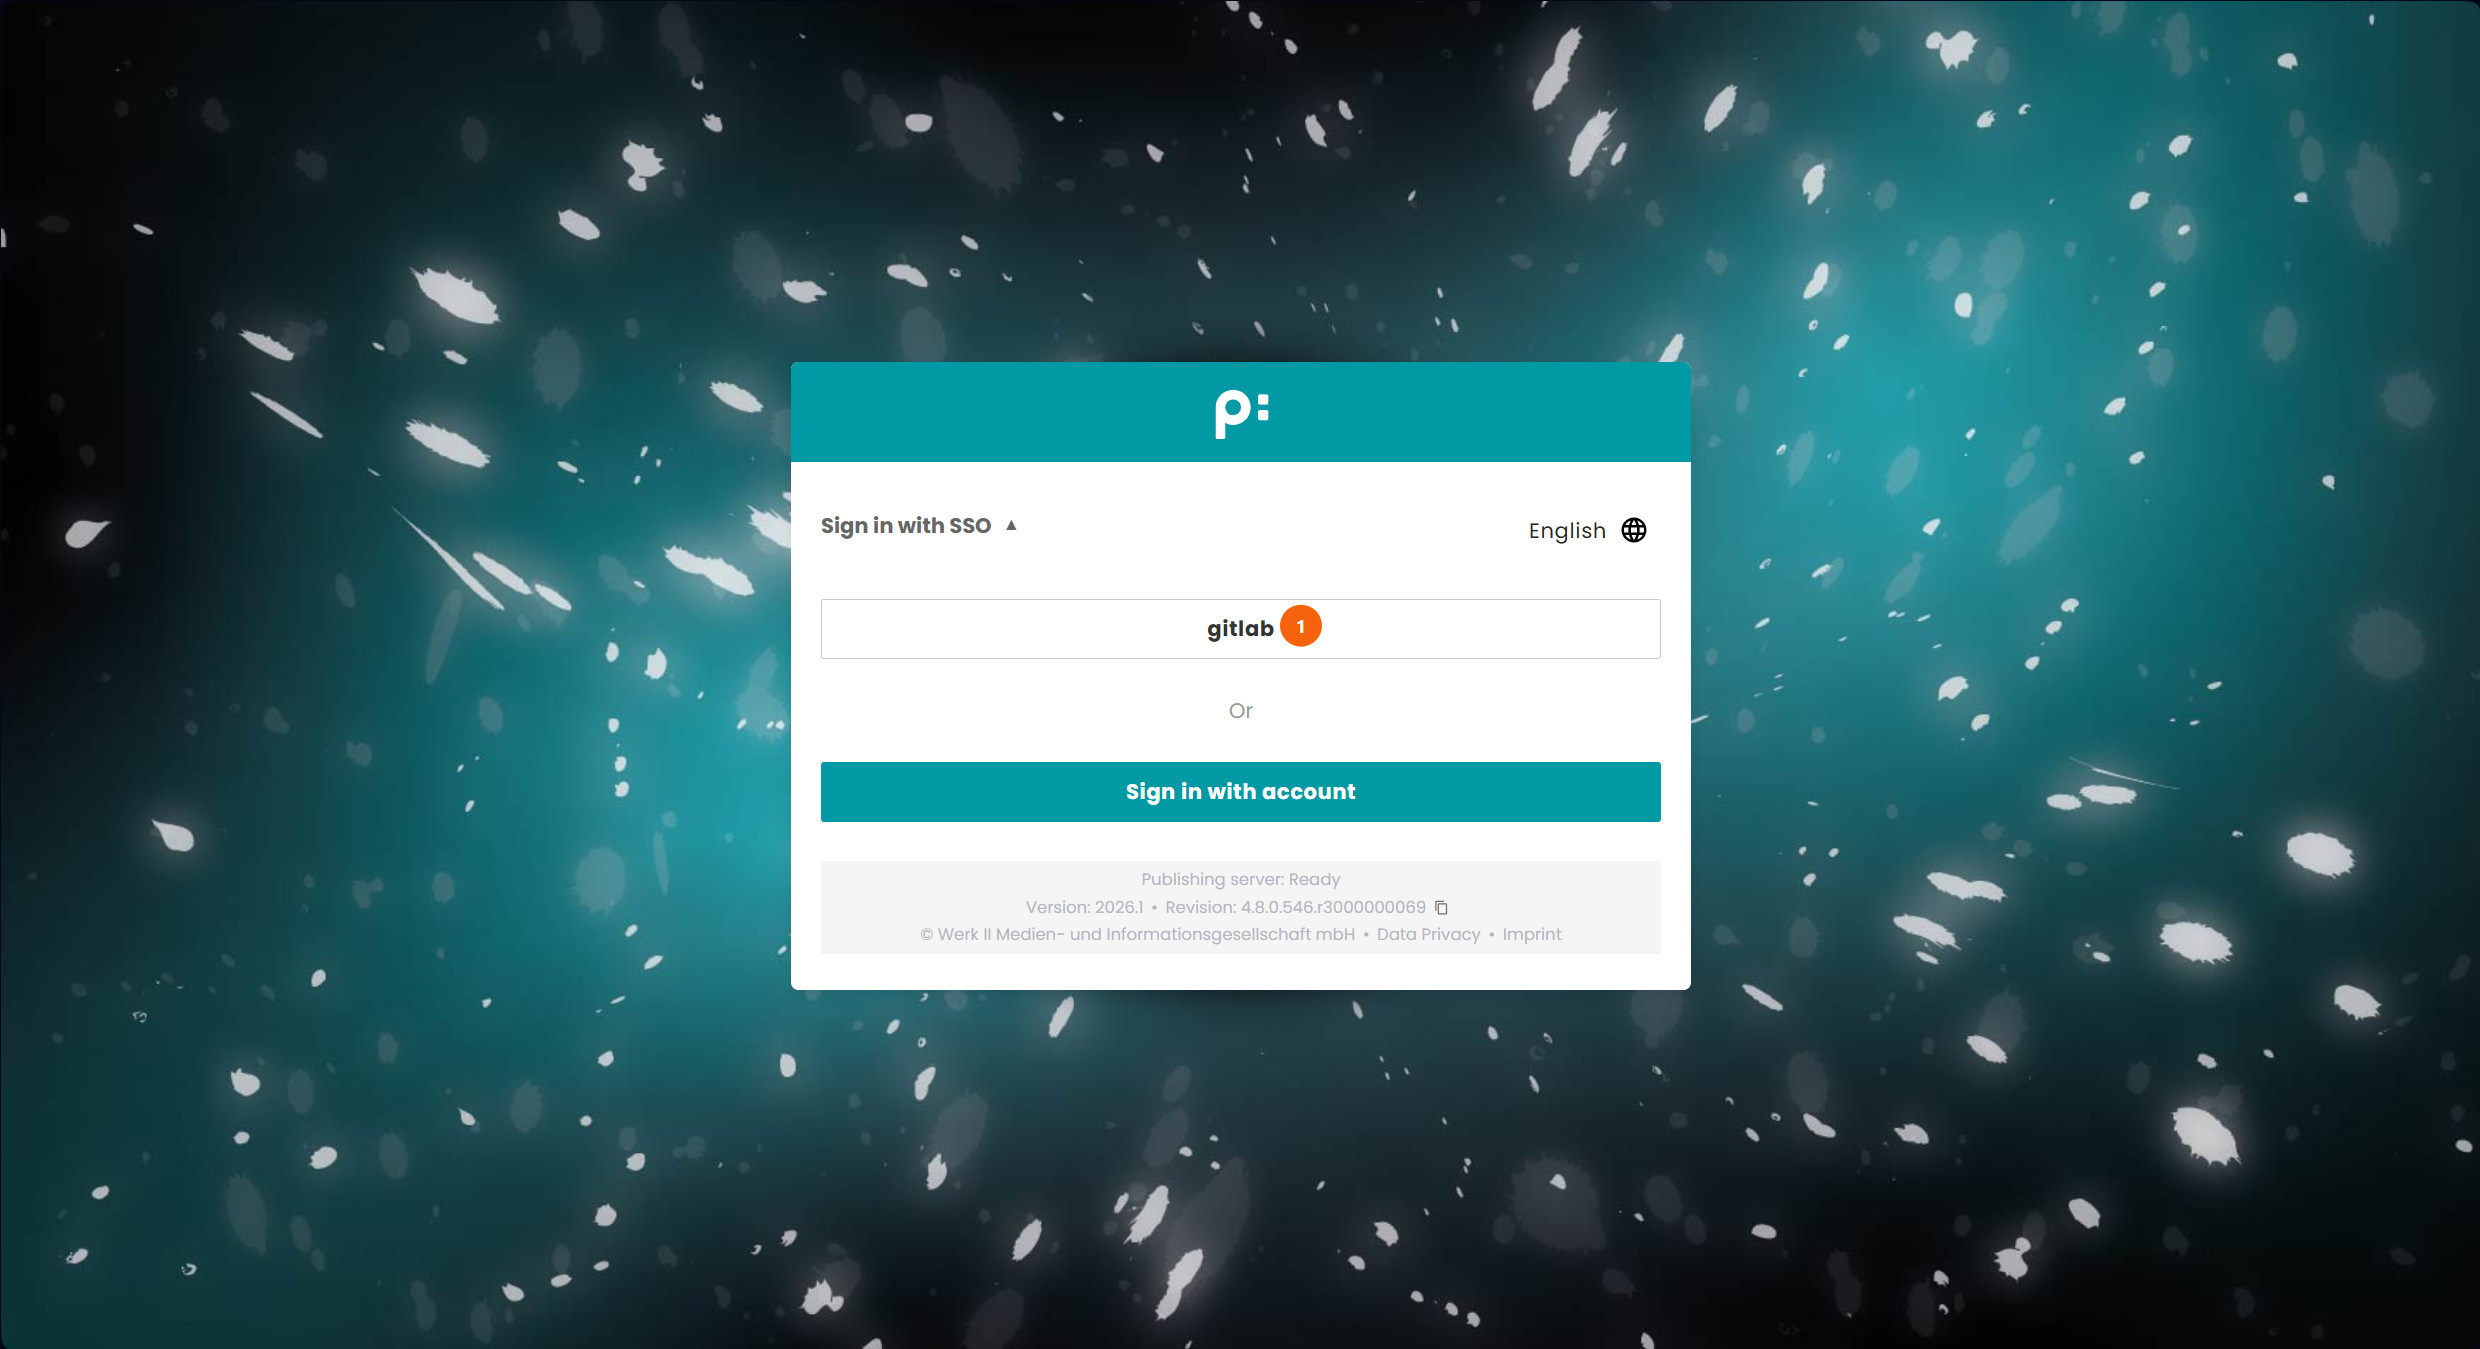
Each configured identity provider is shown as a separate button labeled with the realm name. To sign in:
- Click the button for the desired identity provider.
- The browser redirects to the external identity provider's login page.
- After successful authentication with the identity provider, the browser redirects back to priint:suite.
If the user already has an active session with the identity provider, the redirect may complete without requiring any additional credentials.
3.1 App Switcher
After a successful SSO sign-in, the App Switcher is displayed. It allows the user to choose which application and project to open.
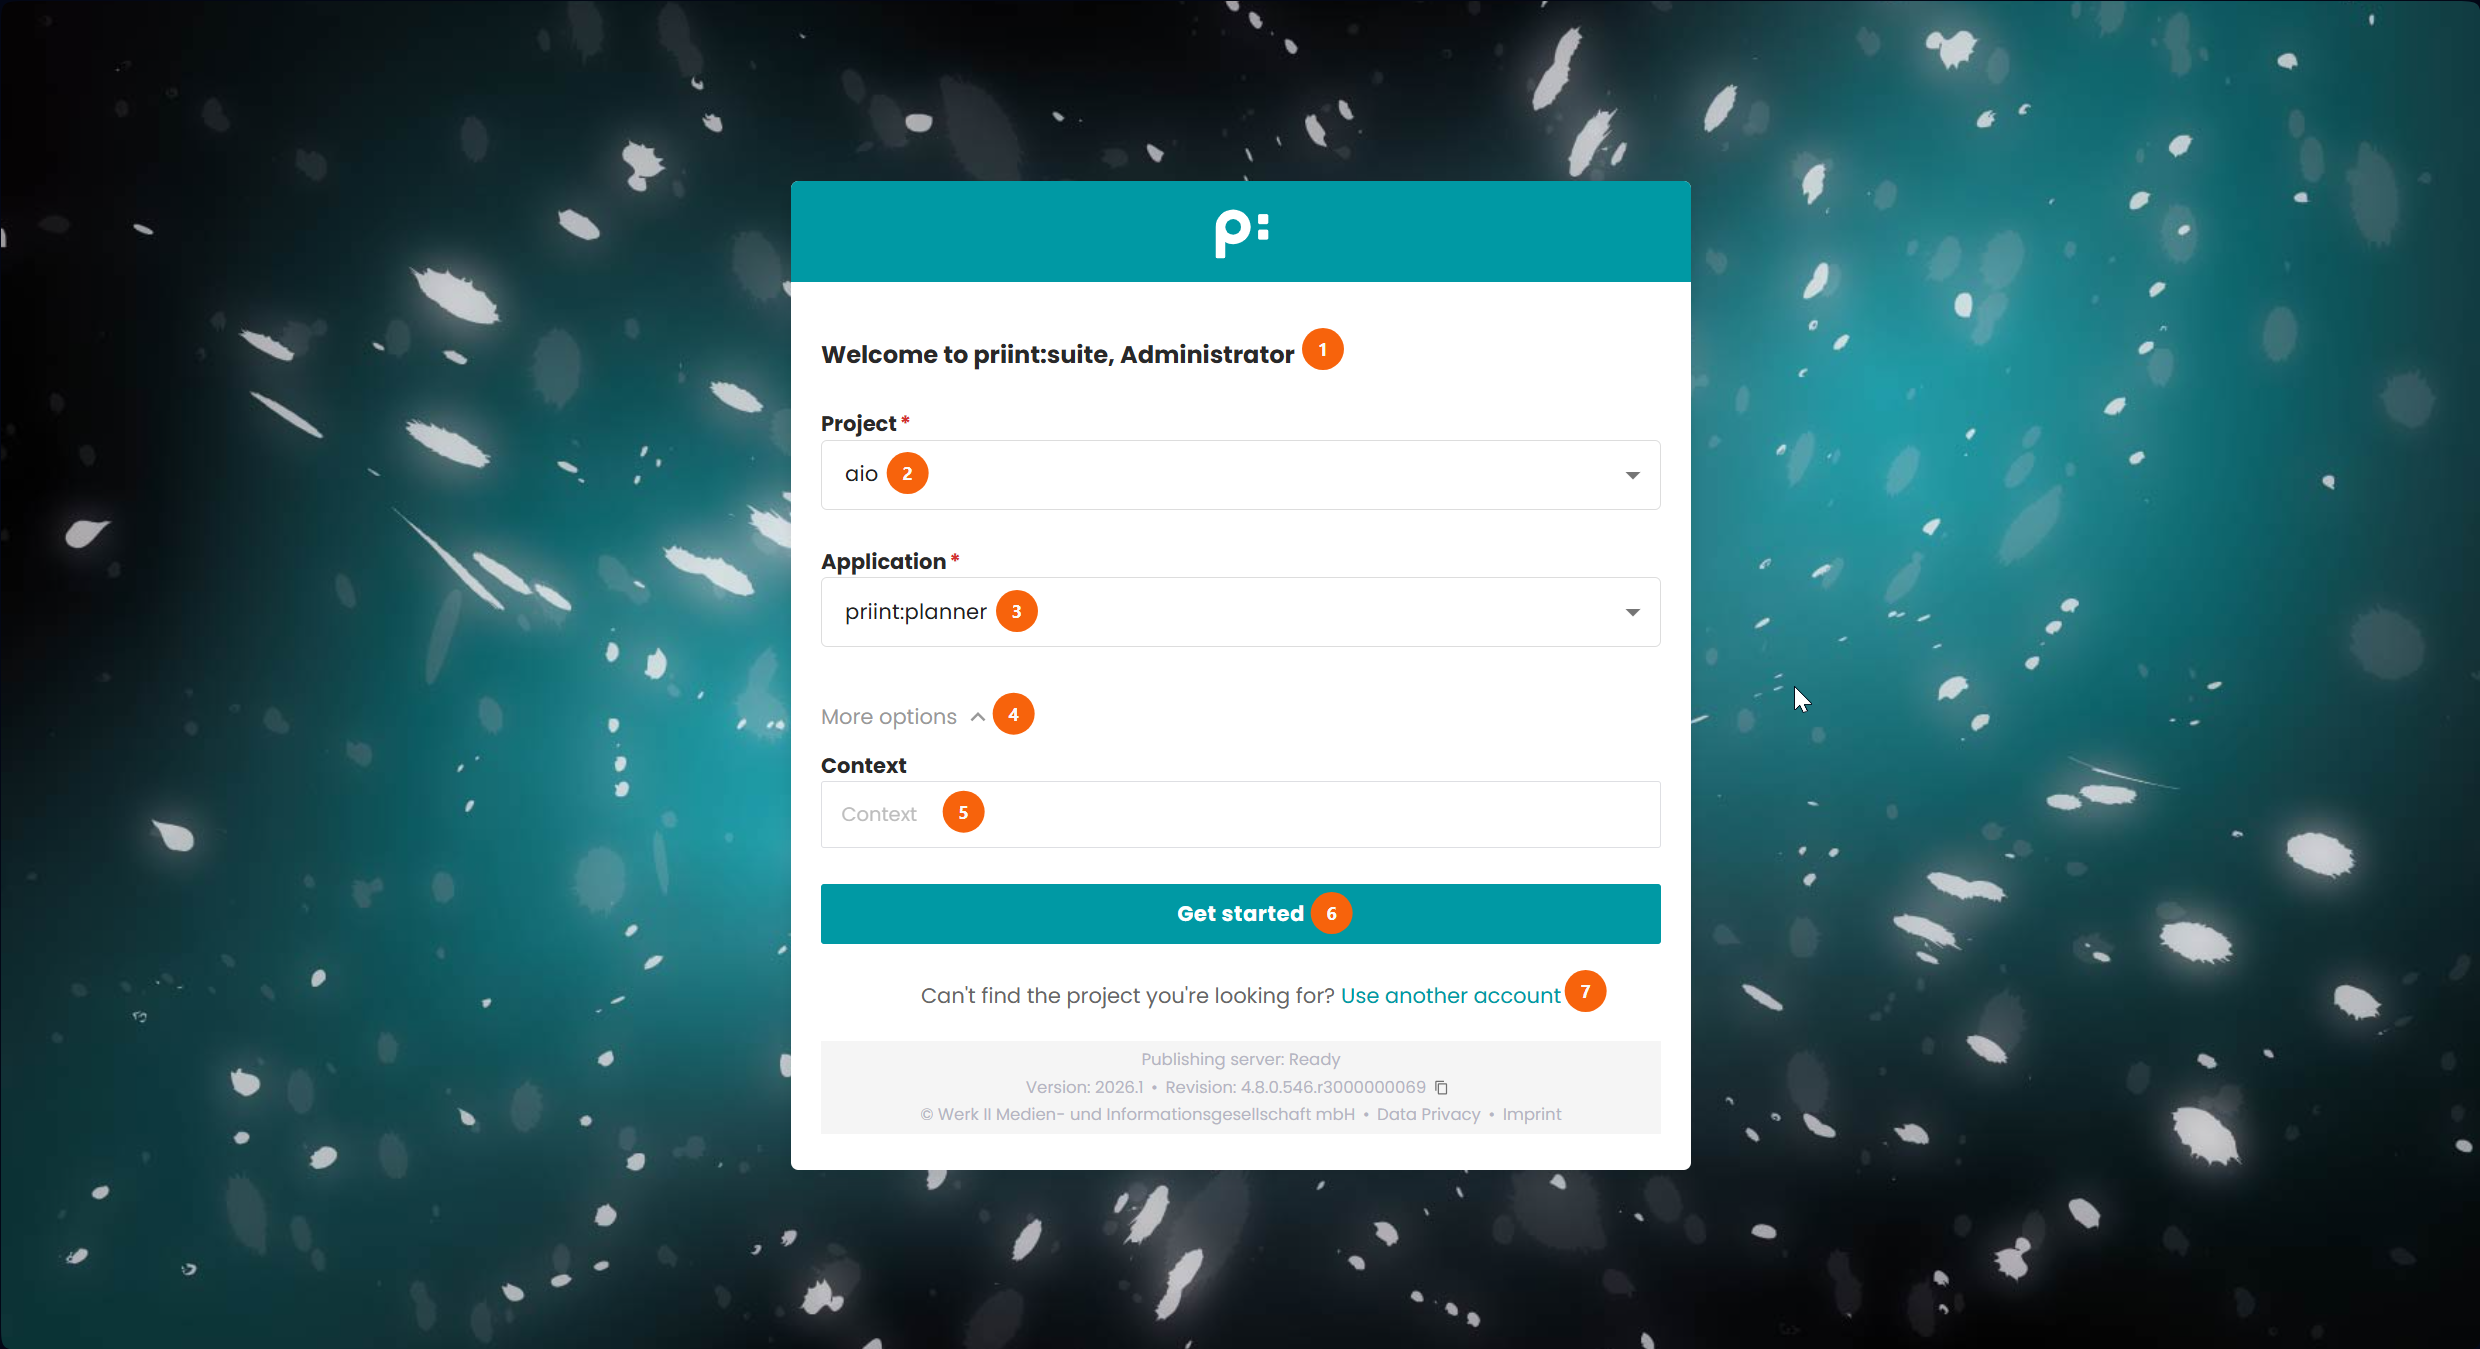
- A welcome message showing the authenticated user's name.
- The Project dropdown for selecting the priint:suite project (dataset) to work in. If only one project is available, the dropdown is disabled.
- The Application dropdown for selecting the target application (e.g. priint:neowise, priint:planner). If only one application is available (e.g. restrictions with access rights or configuration), the dropdown is disabled.
- The More options toggle expands an additional section for advanced users.
- The Context field (visible after expanding More options) allows passing an optional data context to the target application.
- The Get started button opens the selected application. It is enabled only when both a project and an application are selected.
- The Use another account link signs out the current SSO session and returns the user to the login form.
The project and application selections are remembered between sessions so that the user does not have to re-select them on the next login.
4 Changing Password
If the user's account requires a password change before continuing, the Change Password screen is shown automatically after authentication.
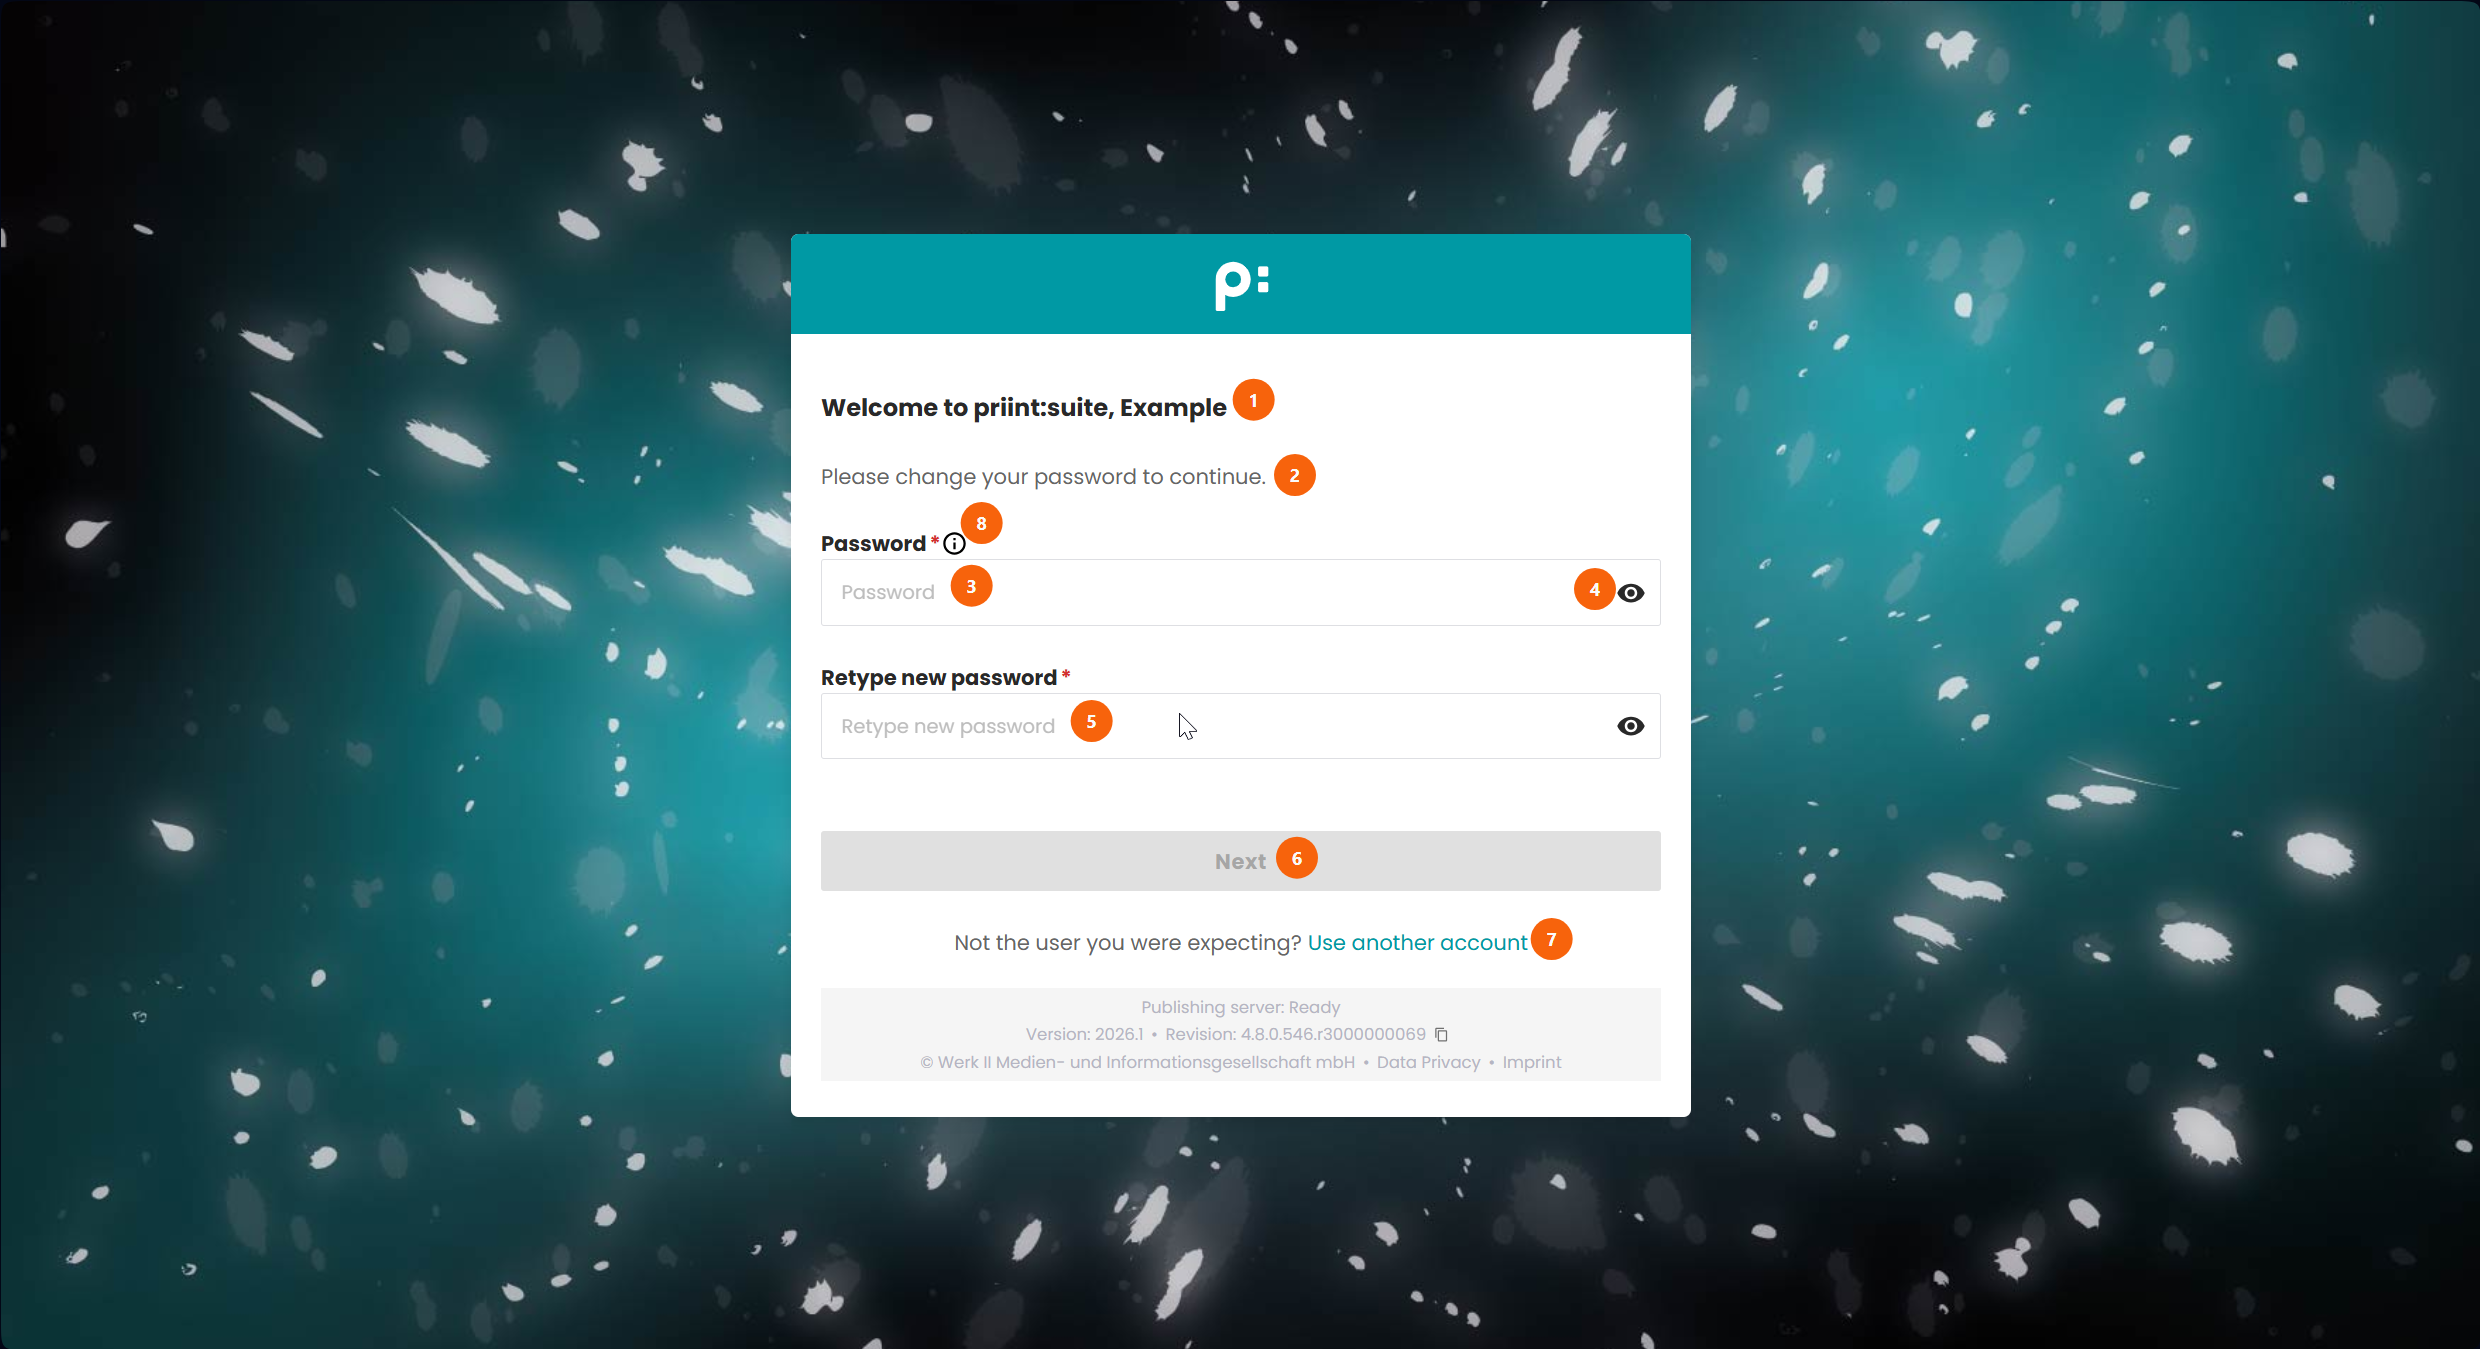
- A welcome message showing the authenticated user's name.
- An information message explaining that a new password must be set before proceeding.
- The Password field for entering the new password. An info icon next to the label shows the password requirements when hovered.
- The show/hide toggle reveals or conceals the password text.
- The Confirm password field for re-entering the new password.
- The Next button submits the new password. It is enabled only when both fields are filled in.
- The Use another account link signs out and returns the user to the login form.
If the two password entries do not match, or if the new password does not satisfy the configured password rules, an error message is displayed below the form.
After the password is changed successfully, the user is directed to the App Switcher (see section 3.1).
Password rules (minimum length, required character types, etc.) are configured on the server side. Hover over the info icon next to the Password (8) field to see the requirements that apply to your installation.