Examples
The AccPack Generic Placeholder packages include a wide set of placeholders for everyday layout tasks: product images, attribute values, translated labels, and much more. You set up a frame once, and it fills with the right content for every product when the document is built, without the need for project-specific scripting.
The examples below demonstrate how to use three common placeholders to help you automate your layouts. The image shows all three working together in one layout: the product image, a product attribute, and a translated static label.
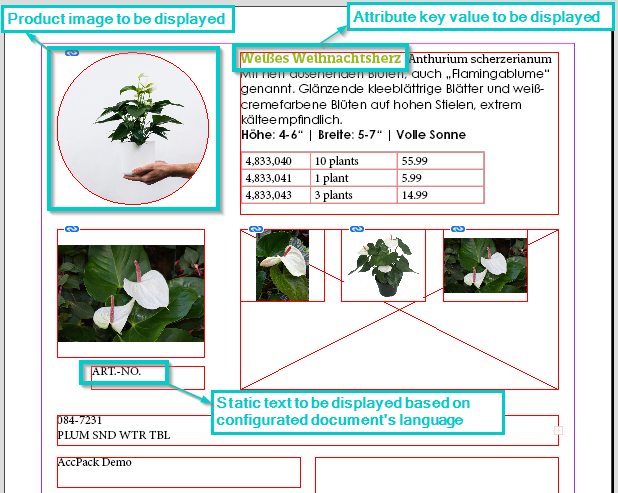
You can follow this page in two ways. To jump straight to the finished result, open the existing template in the demo system. To find out more about it, see the Demo Data and the demo templates.
If you want to learn how to assign the Generic Placeholders in your own template, follow the guides below and build the template yourself. Check the other Placeholders for detailed usage and more placeholders to support your project requirements.
If you're ready to get started, install the AccPack Generic Placeholders, then go through the steps below to see your data in the template.
Using AccPack_MediaAsset placeholder to display a product image in a template
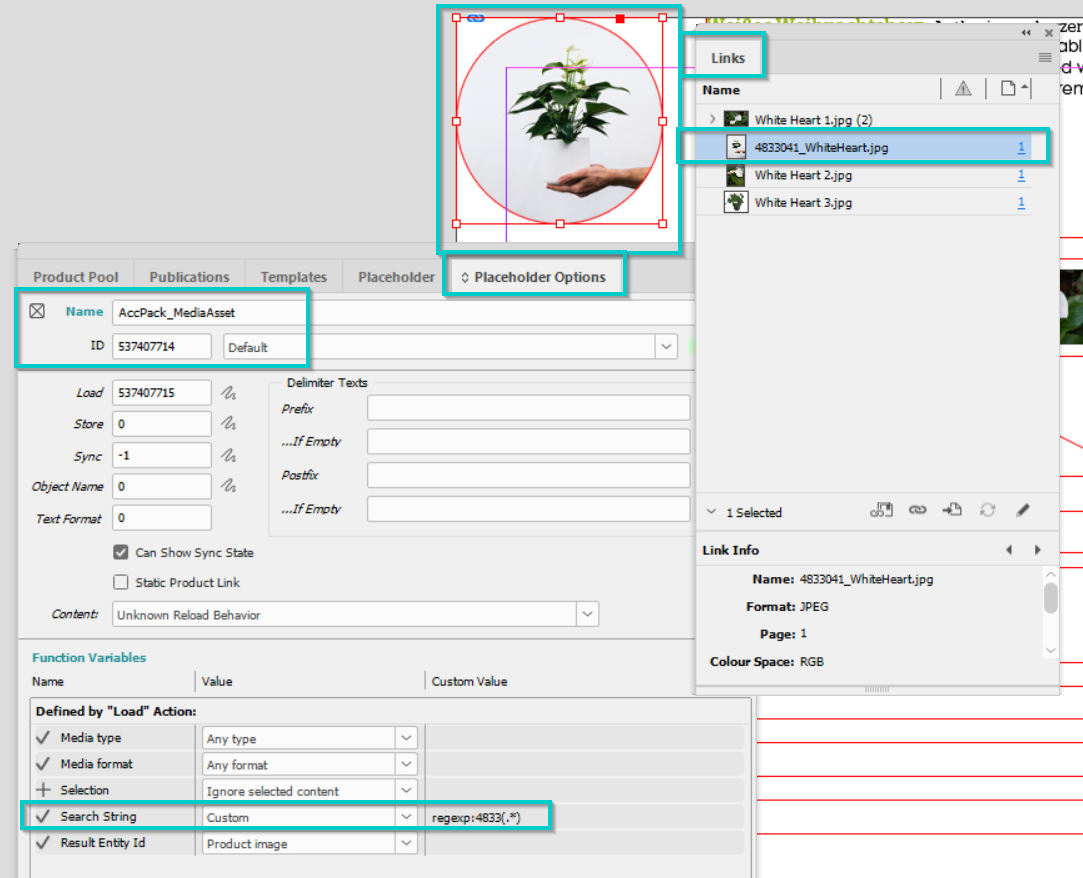
This example demonstrates how to configure a frame to automatically find and display a specific JPG image for a product named "White heart."
For more details of the AccPack_MediaAsset placeholder you can check this document: AccPack_MediaAsset guide
What You Need
To follow this example, we use the following pre-defined items in the demo environment. If you are using your own Data, please replace the expected values accordingly.
-
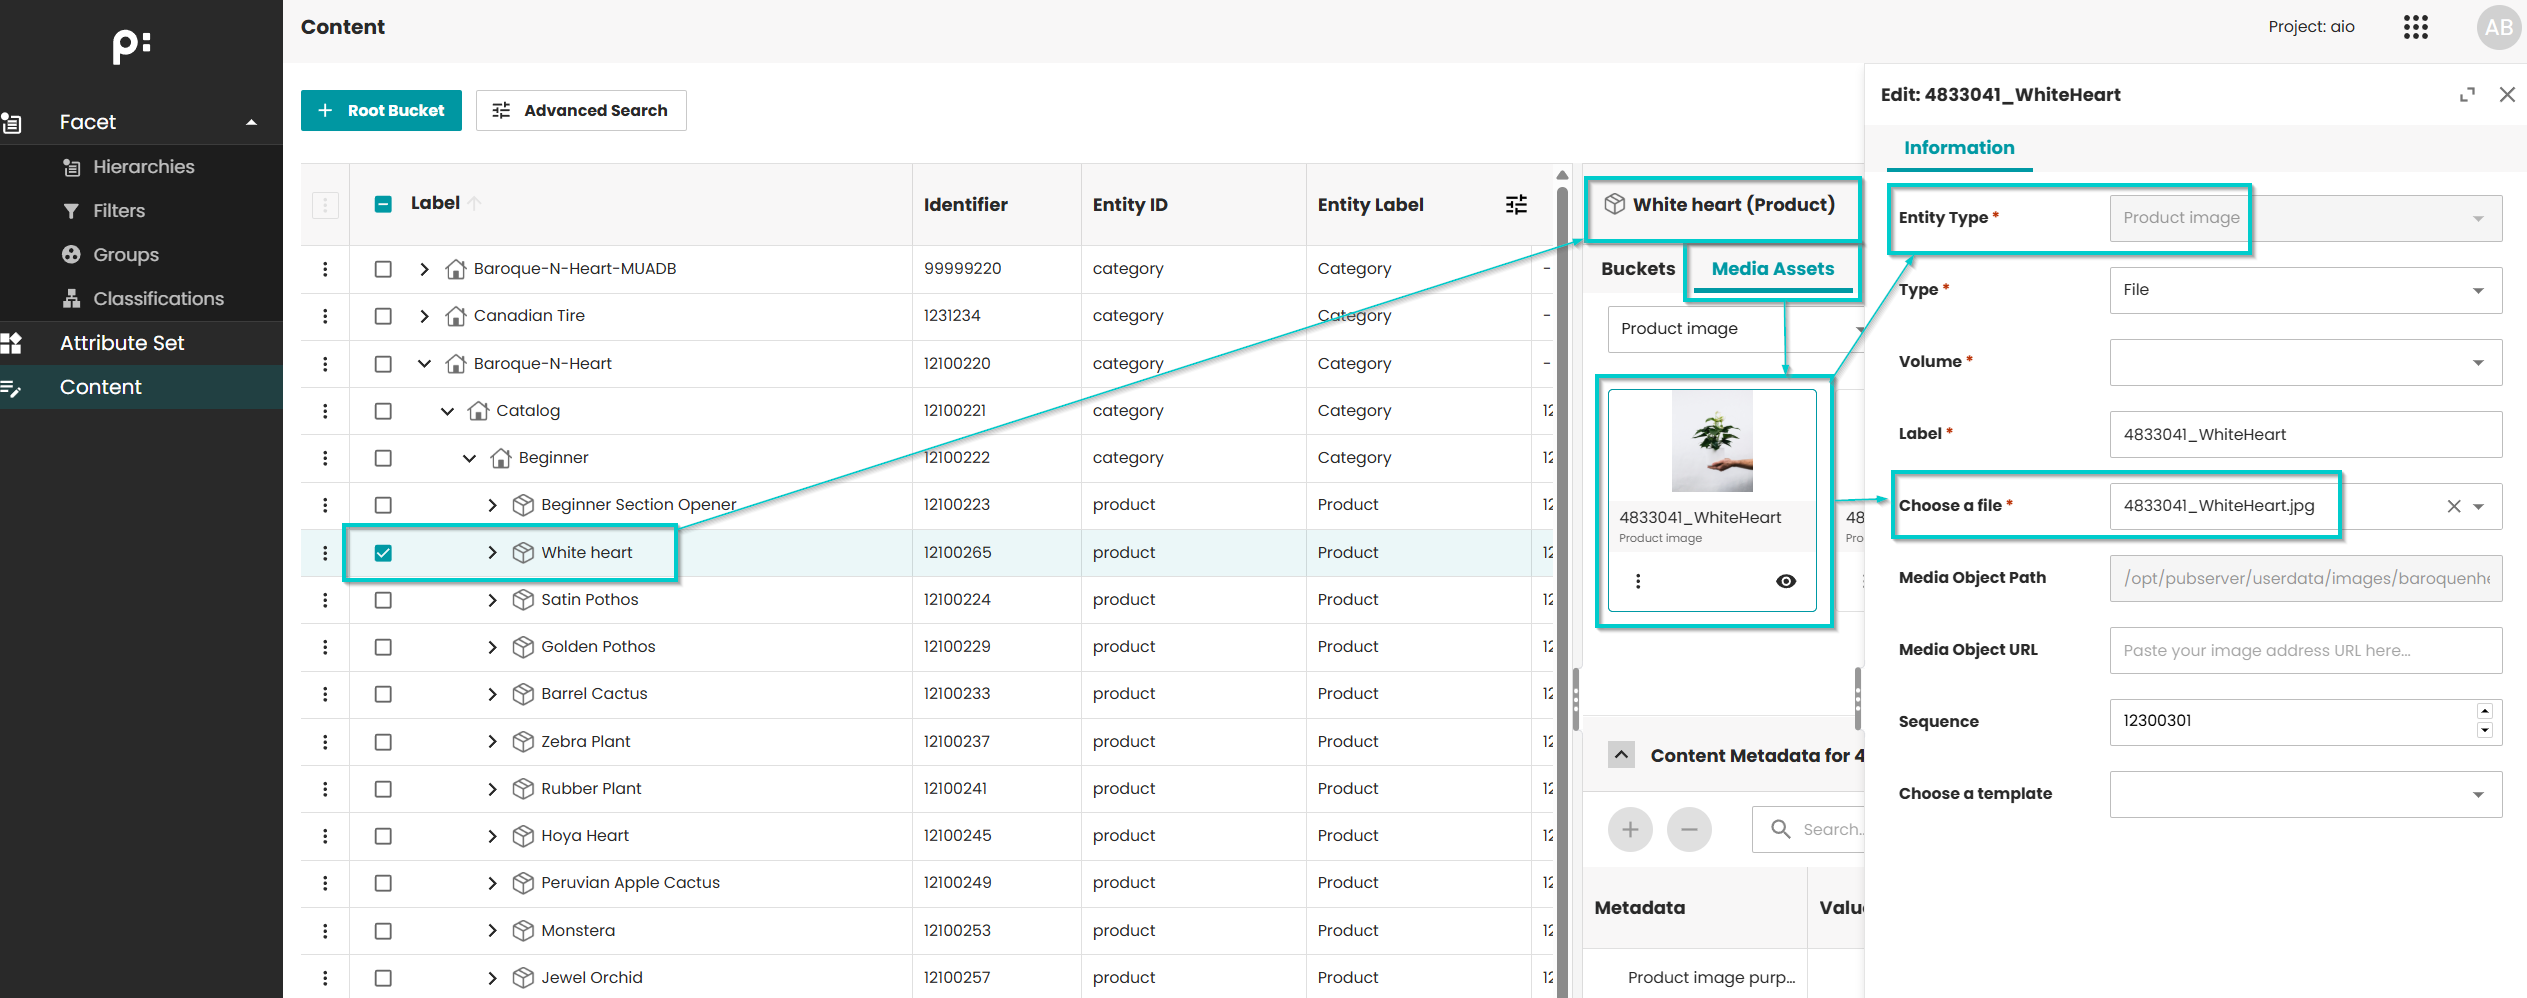
Product Data: "White heart" product.
-
Target Image: "4833041_WhiteHeart.JPG".
-
Media asset entity type: Product image.
Step-by-Step Guide
1. Assign the Placeholder
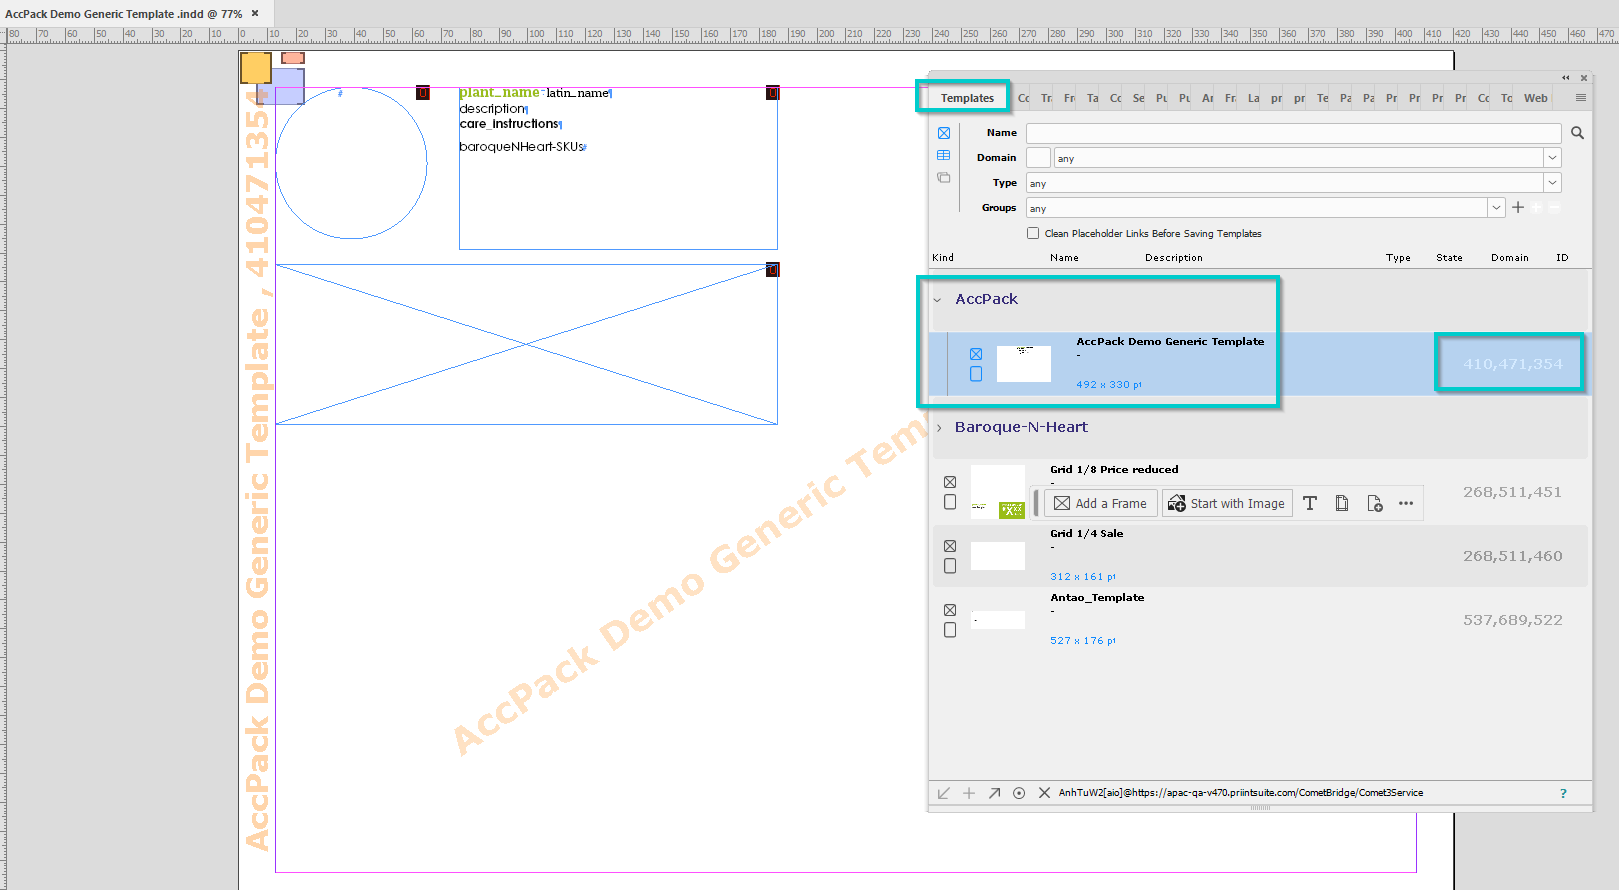
First, we must connect to our target system from priint:comet and open the Templates panel.
Then, we open (or create) the desired template (in example: AccPack Demo Generic Template, ID: 410471354) in Adobe
InDesign.
-
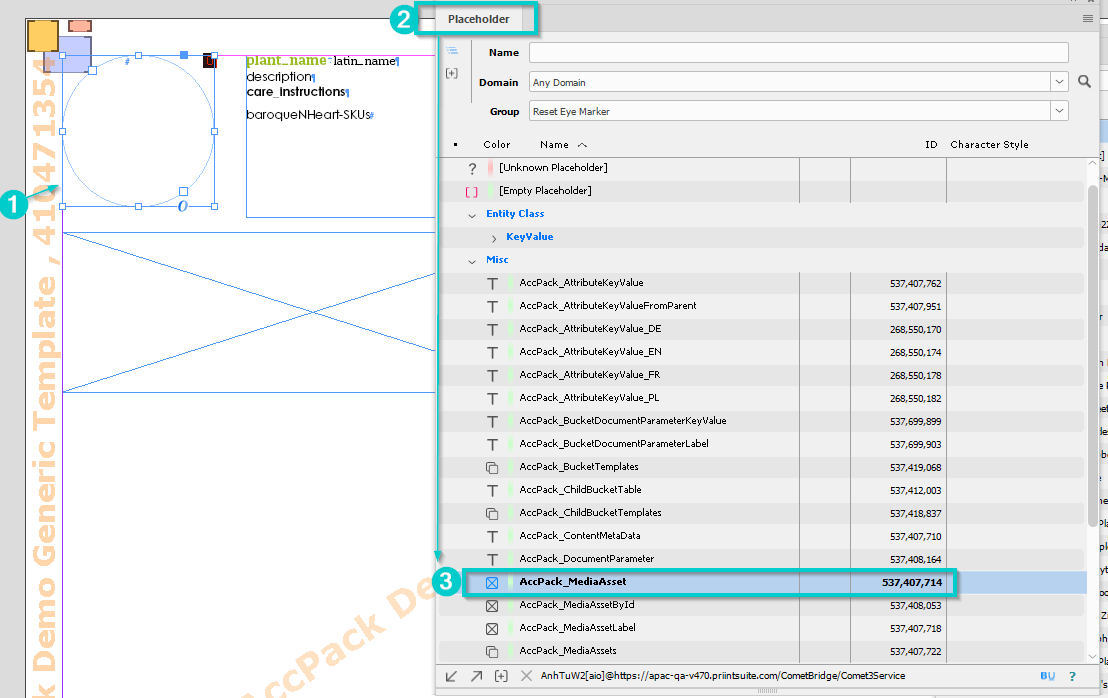
Select the image frame where you want the product shot to appear.
-
Open the Placeholder tab in the priint:comet plugins for Adobe InDesign and select the AccPack_MediaAsset placeholder (ID:
537407714).
2. Configure Function Variables
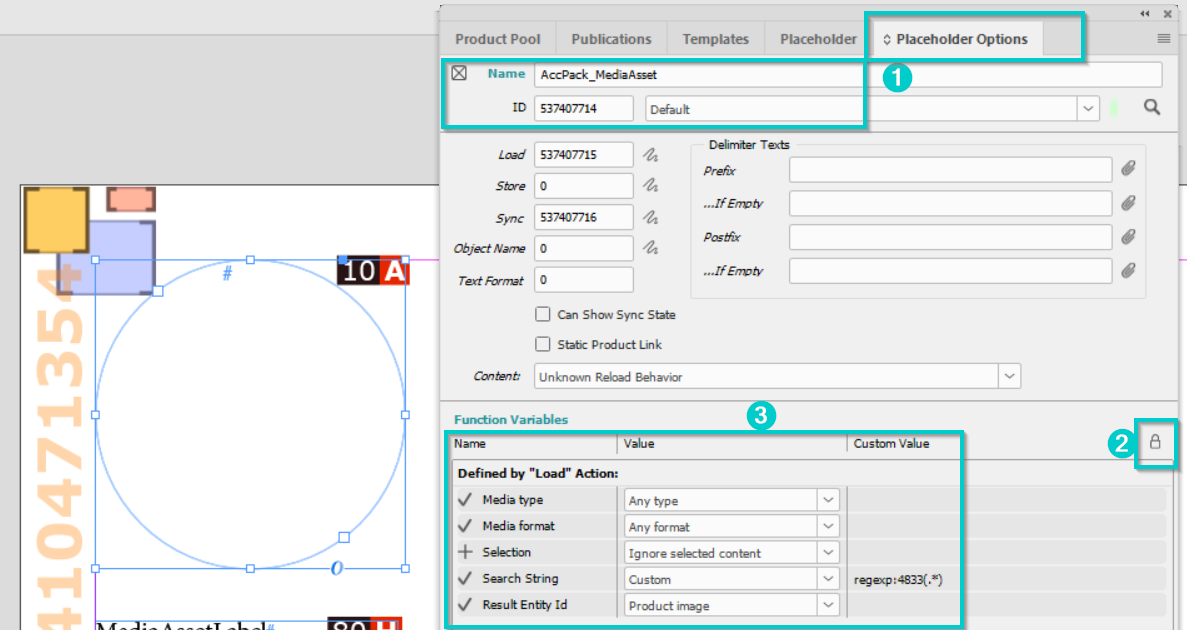
Now, we define the logic that tells the placeholder exactly which image to find. Click the lock icon in the * Placeholder Options* tab to enable editing.
-
Media Type: Any type
- Why: We select "Any type" because we want the system to search all available media categories without restrictions.
-
Media Format: JPG
- Why: Our demo images are stored in JPG format, so we need to select JPG here so the system knows which file type to look for.
-
Selection: Ignore selected content
- Why: This setting tells the placeholder to recognize every image linked to the product in the database, bypassing any manual selections made in the Planner UI.
-
Search String: regexp:4833(.*)
- Why: This uses a "Regular Expression" (a pattern search) to find any image whose name starts with "4833," which is our product's identification code.
-
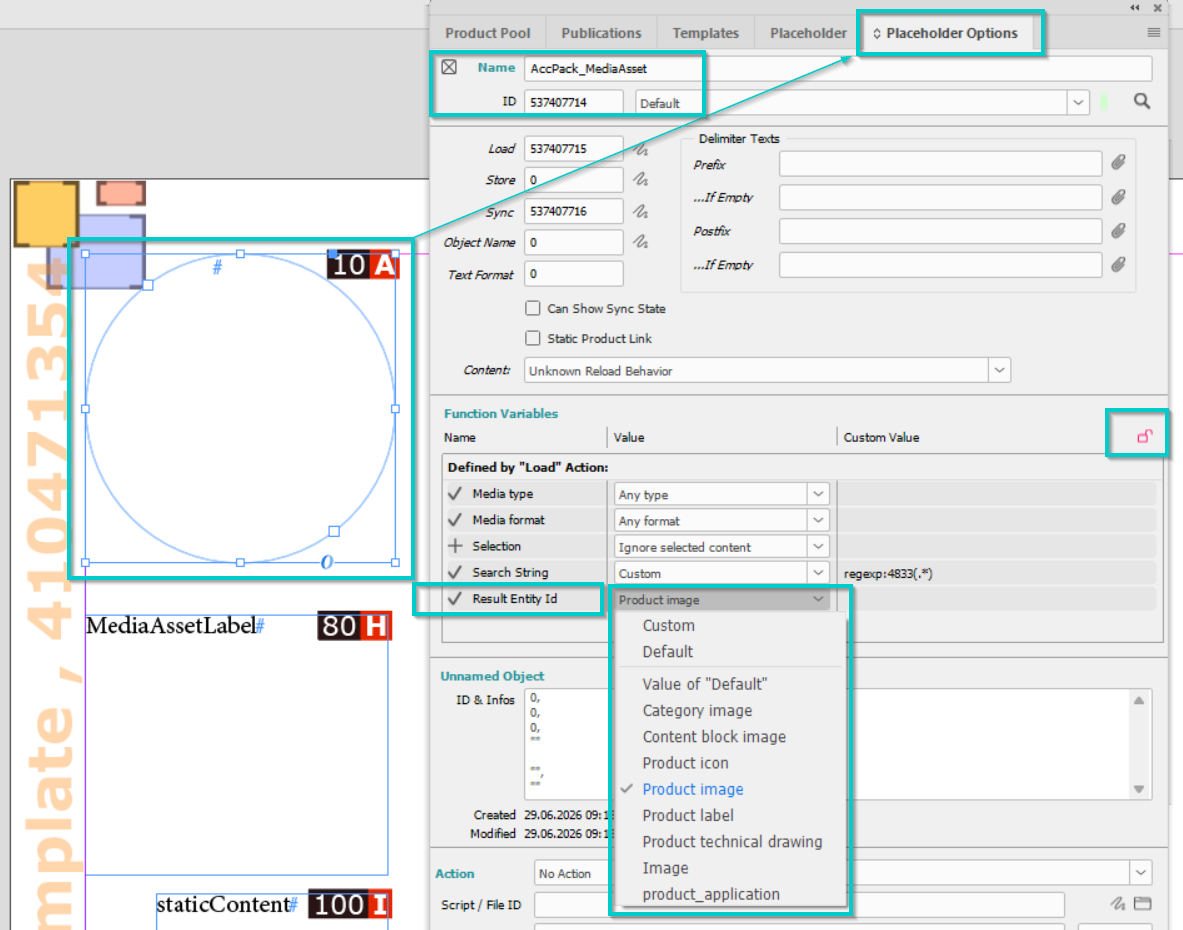
Result Entity Id: Product image
- Why: This tells the system that we are specifically looking for a "Product image" asset rather than a logo, icon, or technical drawing.
3. Save and Preview
Once configured, save the template. When the template is built for the "White heart" product, the system will automatically find the JPG starting with "4833" and place it in the frame.
Result
The result is a fully automated image frame. Instead of a designer manually placing the "White heart" JPG, the placeholder evaluates the product data and renders the correct image instantly during the document buildup.
Using AccPack_AttributeKeyValue placeholder to display an attribute in a template
When storing simple texts we often recommend using KeyValue entities, they consist of a unique Key that can be used to identify the value that will be placed in the template.The AccPack_AttributeKeyValue placeholder is the standard tool for picking a specific attribute and displaying its value.
For more details of the AccPack_AttributeKeyValue placeholder you can check this document: AccPack_AttributeKeyValue guide
What You Need
To follow this example, we use the following pre-defined items in the demo environment. If you are using your own Data, please replace the expected values accordingly.
-
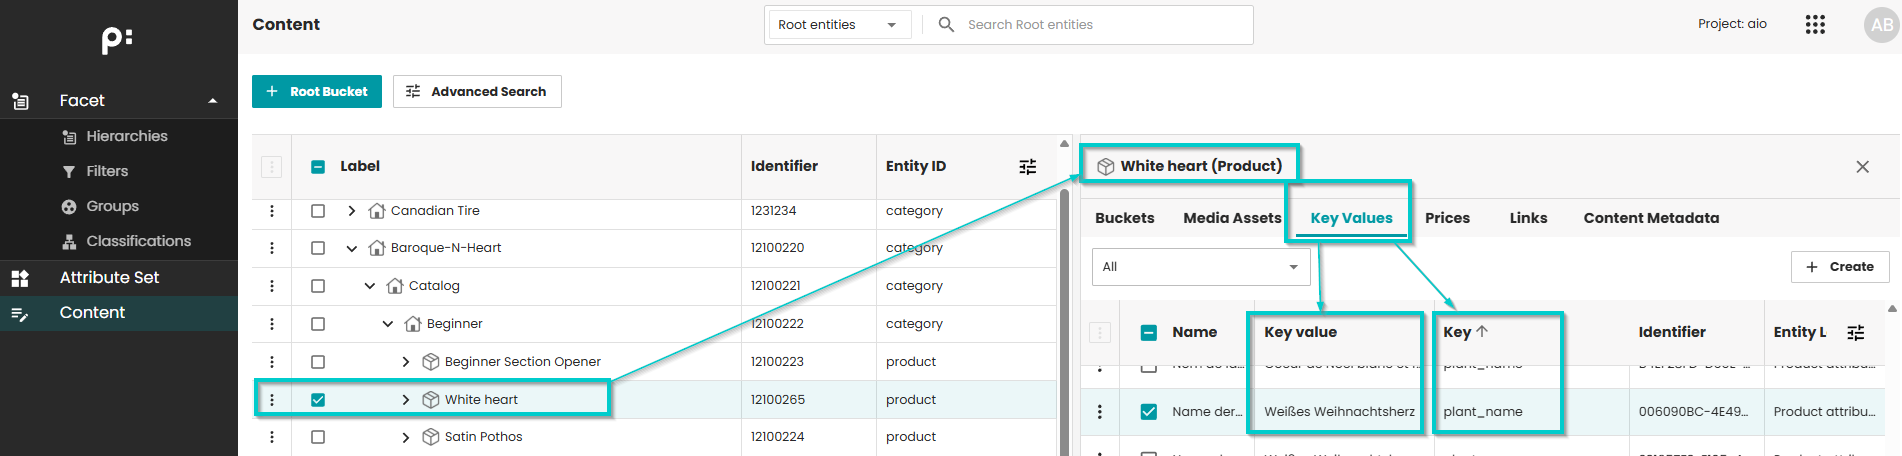
Product: "White heart" product.
-
Target attribute: "plant_name".
Step-by-Step Guide
1. Assign the Placeholder
For this example we assume that you have opened an existing template using the priint:comet Plugins.
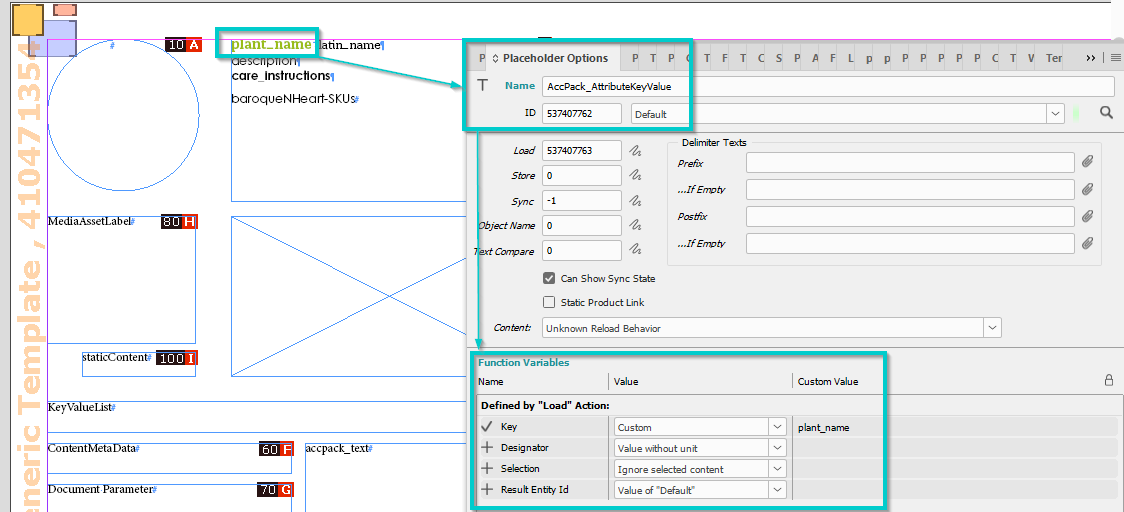
Select the text frame for the plant name and assign the AccPack_AttributeKeyValue placeholder (ID: 537407762).
2. Configure Function Variables
-
Key: plant_name
- Why: This is the key for the attribute we would want to display.
-
Designator: Value without unit
- Why: the unit information of this attribute is not desired to be displayed.
-
Selection: Ignore selected content
- Why: We want the plant name to show up automatically as soon as the product is placed, independent from selections made in the Planner UI
-
Result Entity Id: Product attribute
- Why: This tells the system that the value is a standard attribute of the product.
Result
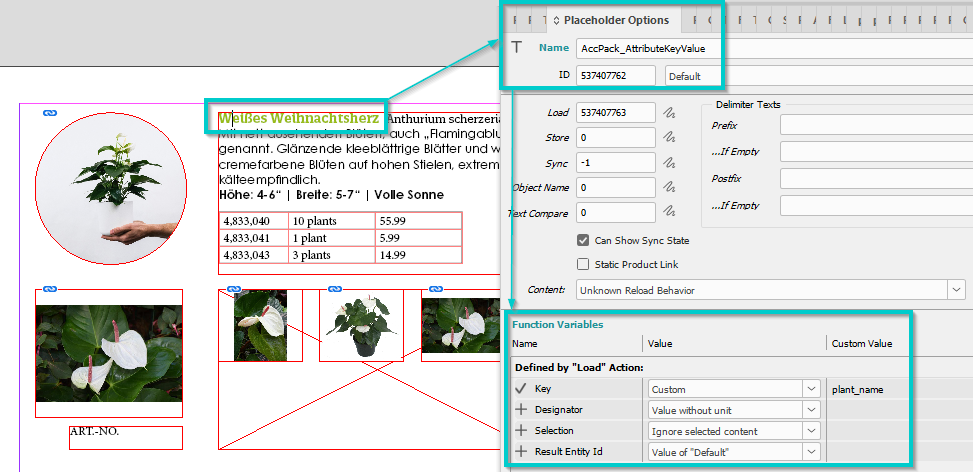
The final result is the display of the key value of attribute "plant_name" of the product "White heart".
Using AccPack_StaticContent to display a Static Label
Some text, like section headers ("Technical Data") or editorial content, is the same for all products but must change based on the catalog's language. The AccPack_StaticContent placeholder loads this text from a central configuration file instead of the product database.
For more details of the AccPack_StaticContent placeholder you can check this document: AccPack_StaticContent guide
What You Need
To follow this example, we use the following pre-defined items in the demo environment. If you are using your own Data, please replace the expected values accordingly.
- Configuration File:
staticContent.xml.
<?xml version="1.0" encoding="UTF-8"?>
<con:PluginConfig xmlns:con="com.priint.pubserver.config.manager/20130620">
    <con:name>staticContent.xml</con:name>
    <con:type>translations</con:type>
    <con:custom>
        <translations>
            <translation identifier="bb_artnumber">
                <entry assortment="" country="" lang="" well="">ART.-NO.</entry>
                <entry assortment="" country="" lang="eng" well="">ART.-NO.</entry>
                <entry assortment="" country="GB" lang="eng" well="">ART.-NO.</entry>
                <entry assortment="" country="" lang="deu" well="">ART.-NR.</entry>
                <entry assortment="" country="DE" lang="deu" well="">ART.-NR.</entry>
            </translation>
        </translations>
    </con:custom>
    <con:dependencies/>
    <con:instances/>
</con:PluginConfig>
- Static Entry:
bb_artnumber(Translations for "Article Number").
Step-by-Step Guide
1. Assign the Placeholder
For this example we assume that you have opened an existing template using the priint:comet Plugins.
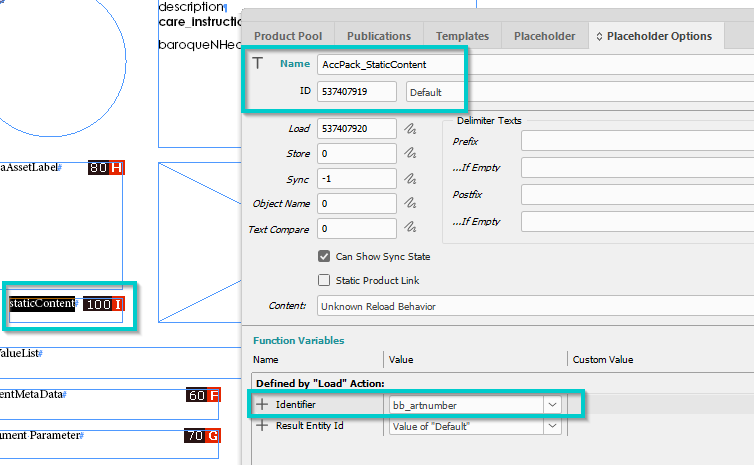
Select a small text frame used for a header and assign the AccPack_StaticContent placeholder.
2. Configure Function Variables
-
Identifier: bb_artnumber.
- Why: This ID links the frame to the
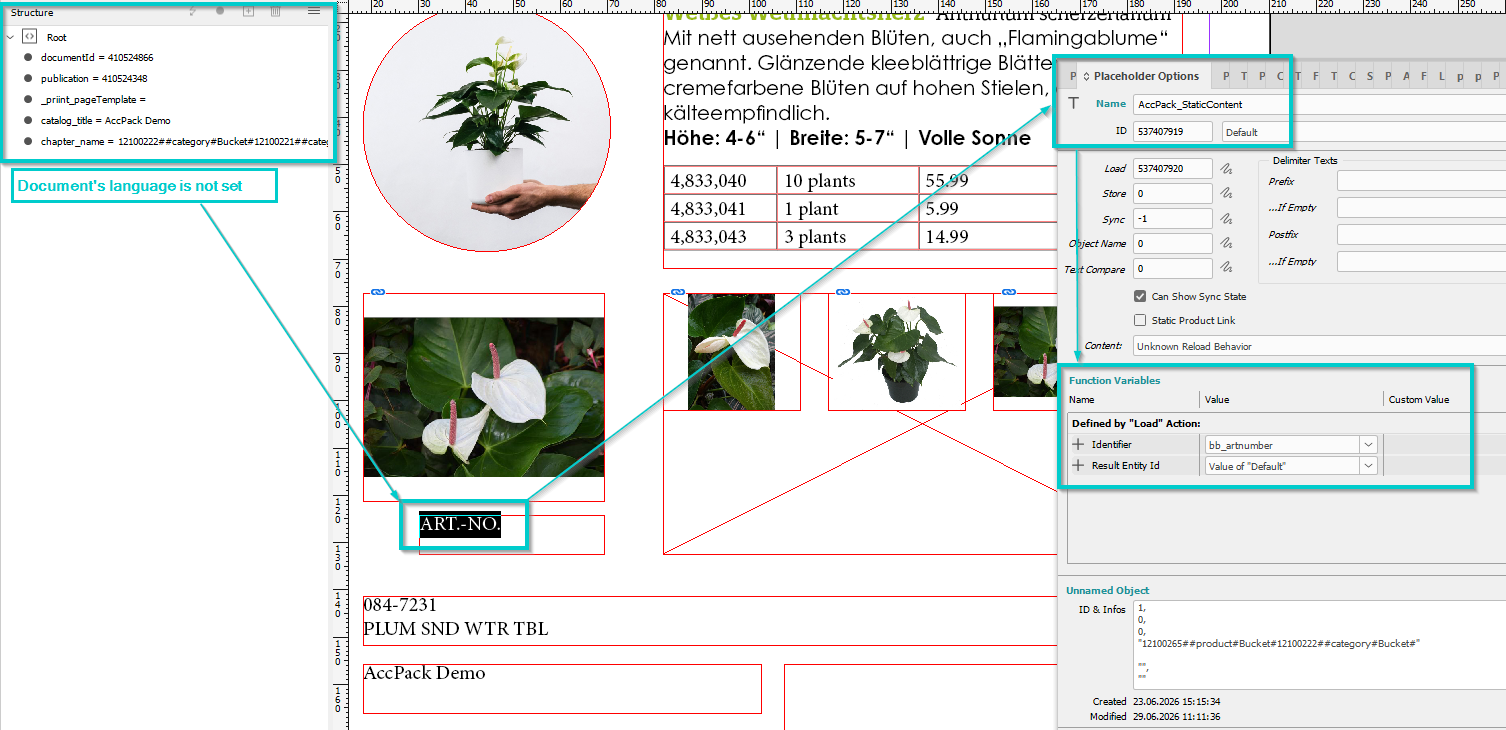
staticContent.xmlfile. Based on the XML provided above, if your document's language is set to German, it will automatically show "ART.-NR"; if set to English or if no language is set, it will show "ART.-NO". Learn more about localization here.
- Why: This ID links the frame to the
Result
In the example the document's language is not set. Hence, the text "ART.-NO" is displayed.
Summary
These three placeholders are of course not enough to cover most common use-cases we encounter in our projects.
To learn more about the other placeholders also being used in the Demo Template at the top of this page, read about the general concepts or check the reference section for a comprehensive overview over all placeholders.