Using the Demo System
Overview
The demo system showcases how the installed AccPacks work together in a complete publication workflow.
This guide provides a high-level walkthrough of the demo project and your first steps into creating your publication and rendering your documents.
Detailed information about each feature used is available in its corresponding documentation.
The demo workflow covers the steps from creation of your first publication, to assigning products, creating a PDF and seeing the final rendered result.
Before you start
Before creating your first publication, make sure that:
- The Consistent Demo and all required Accelerating Packs have been installed. See the Installation Guide
- The demo data has been imported successfully. See the Data Import Example
Demo workflow
The demo follows this workflow:
- Create publication type and assign metadata
- Create publication and assign templates.
- Planning and Rendering.
- Generate the final PDF.
The following sections explain where each demo feature appears during this workflow.
Create Publication Type And Assign Metadata
Follow the guide on Creating Publication Types in priint:admin to learn more about the creation and purpose of the publication type.
The placeholders used in our templates evaluate Context based on the document metadata.
Our default priint:comet rendering script works based on the Product List by Rule AccPack.
Configure at least these parameters for your publication type:
- Language (identifier:
_language) - Country (identifier:
_country) - Rendering Rule Set (identifier:
_renderingruleset)
See the Product List by Rule example for details on these parameters.
Create Publication And Assign Templates
Log in to priint:planner, open the aio project. Create a publication based on the publication type, and then assign templates to the publication.
Create a Publication
Create a publication using the publication type created in the previous step.
-
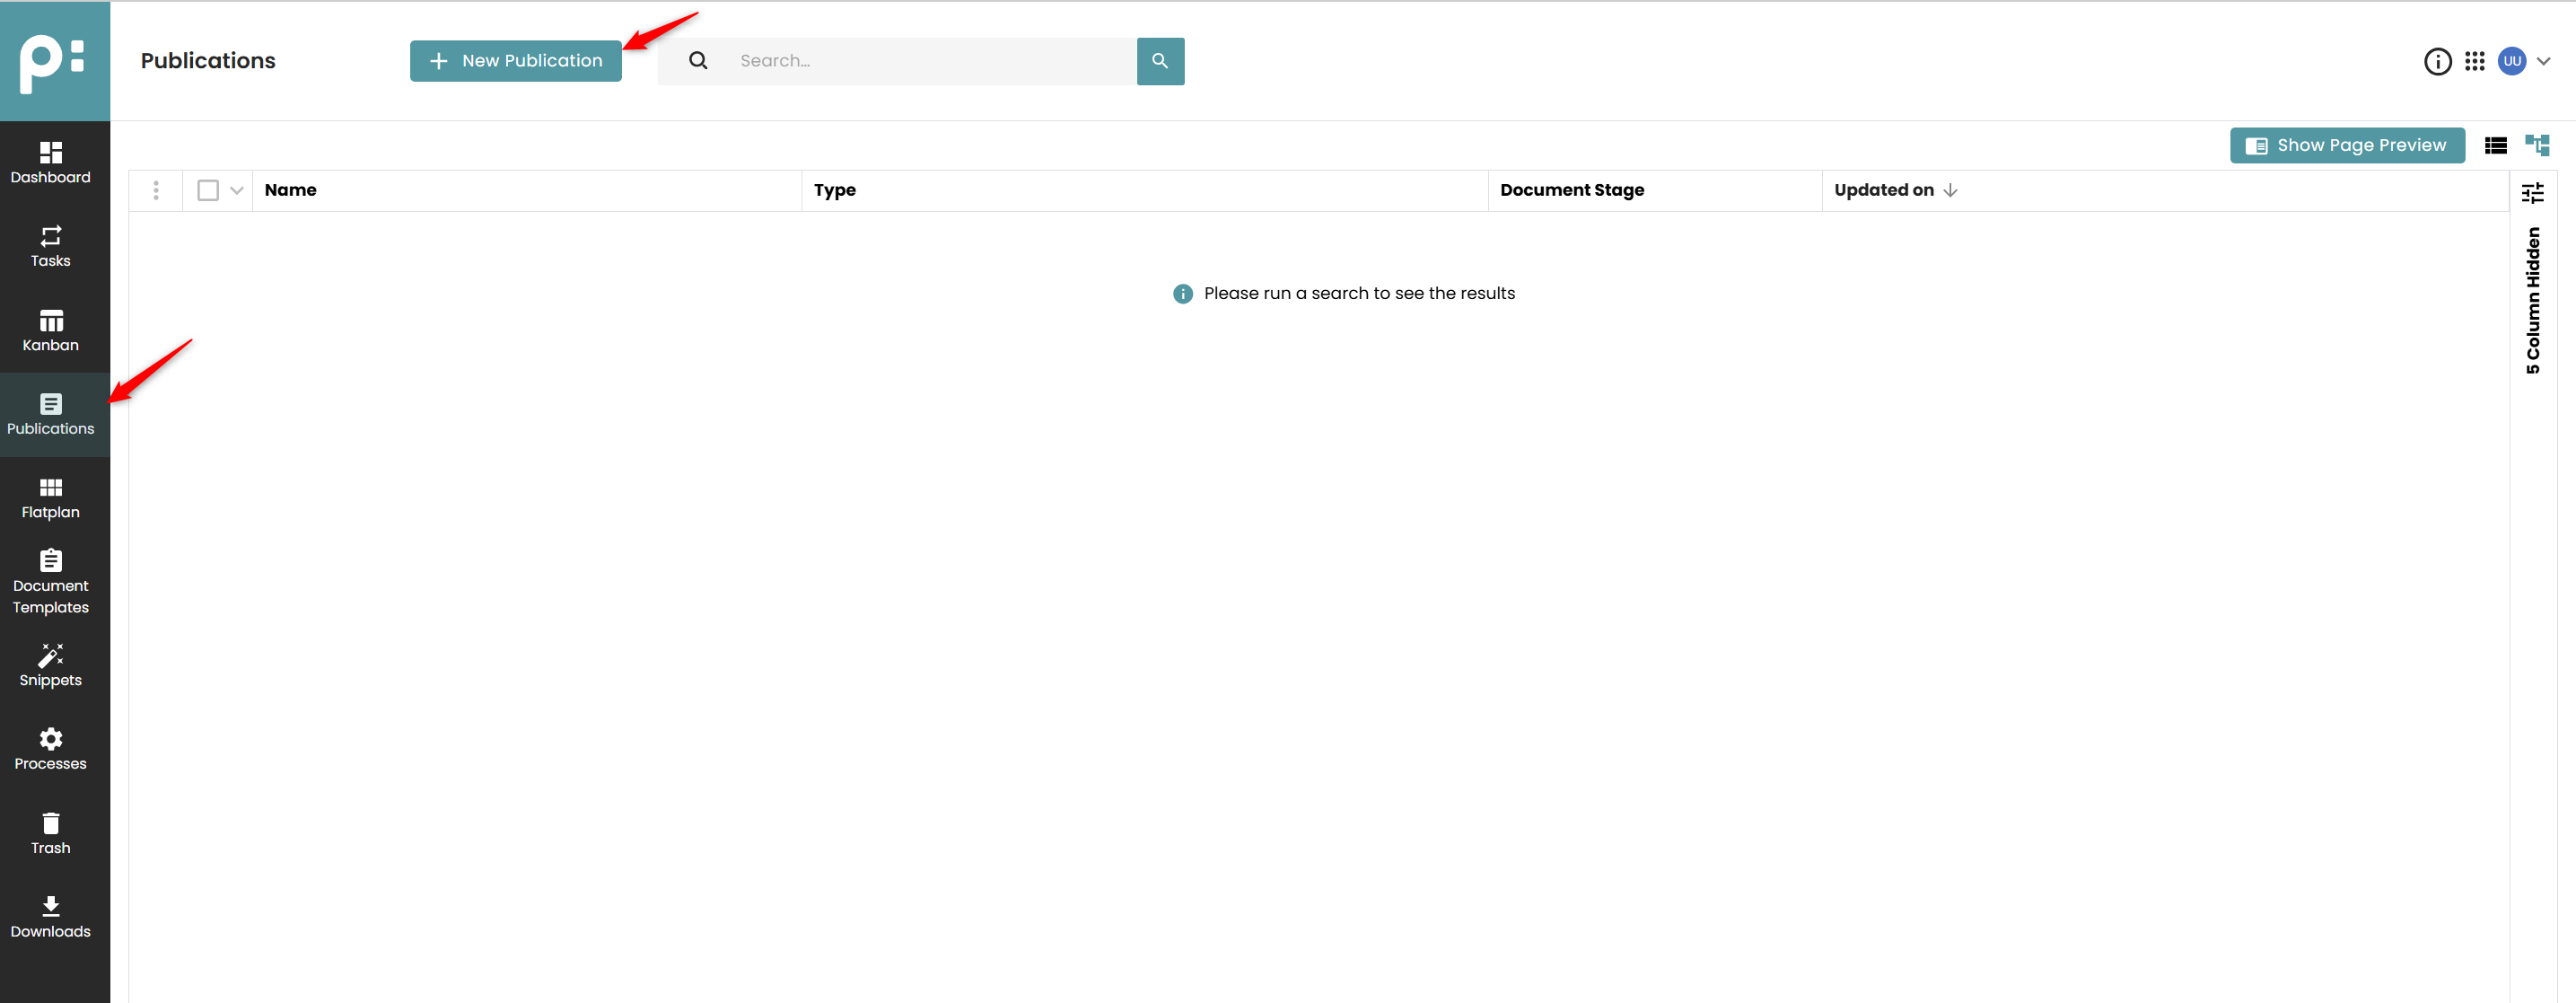
Go to the Publications tab in priint:planner and click New Publication.
-
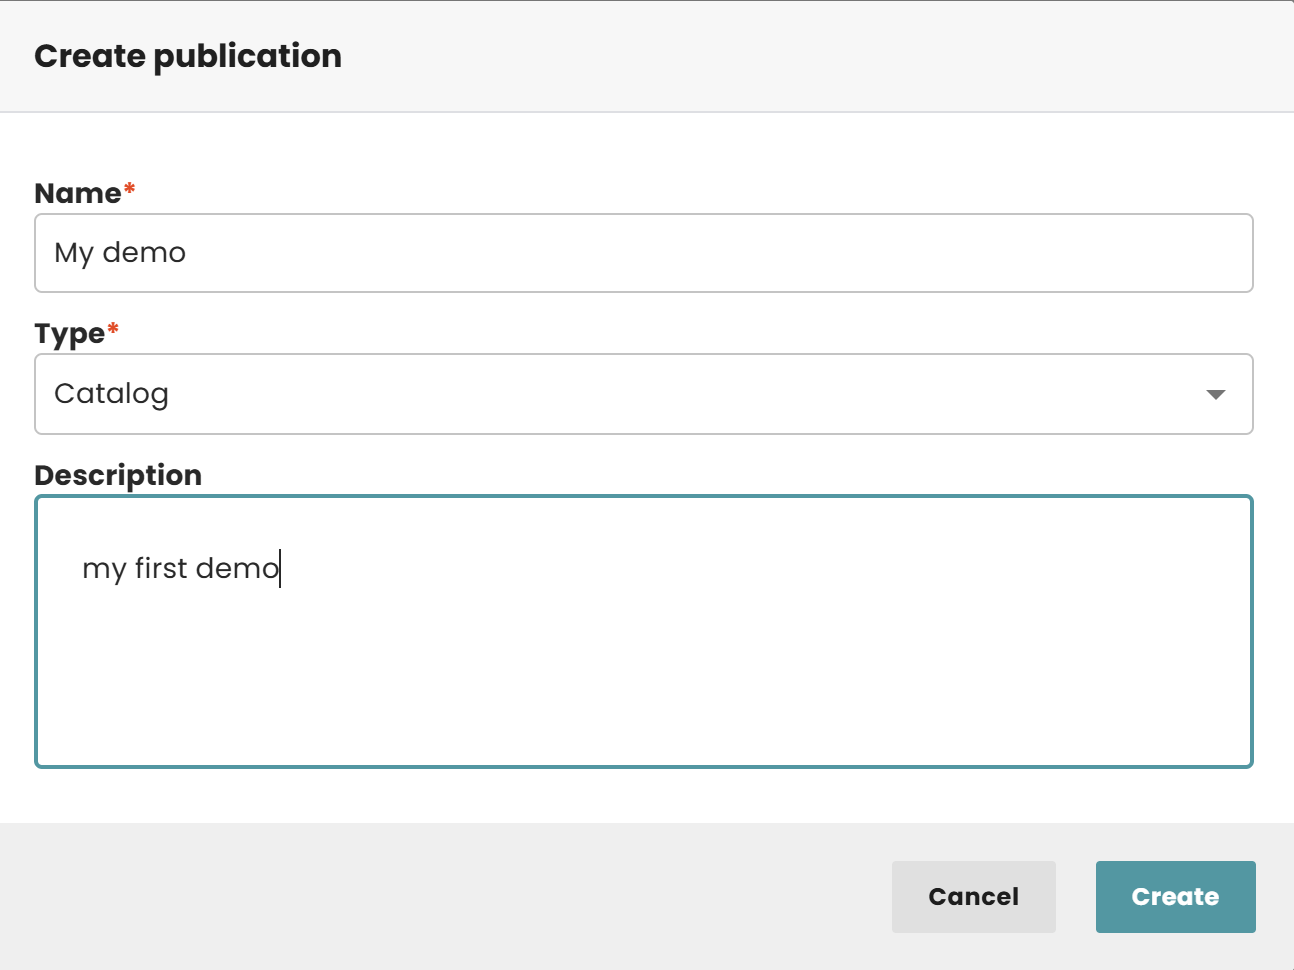
Enter the publication name, publication type, and description, then click Create.
Assign Templates & Change Metadata
-
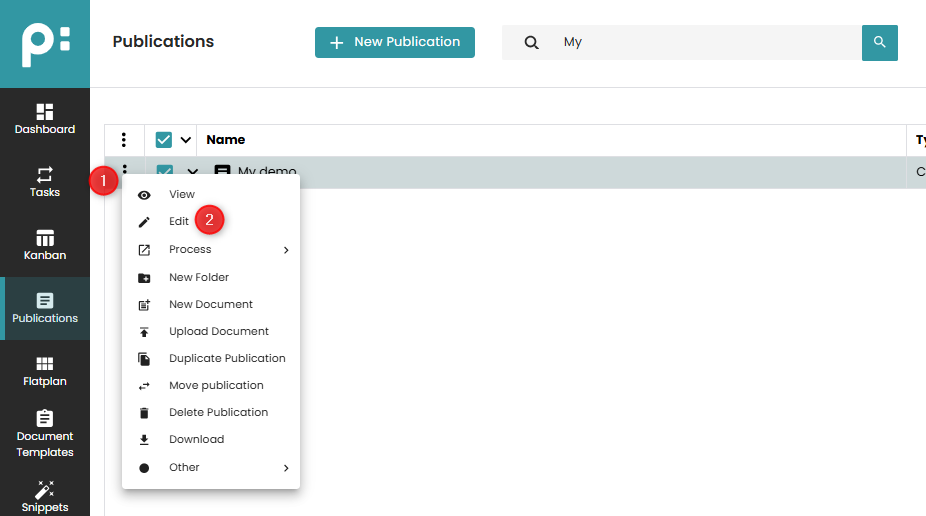
Open the publication, click the three-dot menu, and select Edit.
-
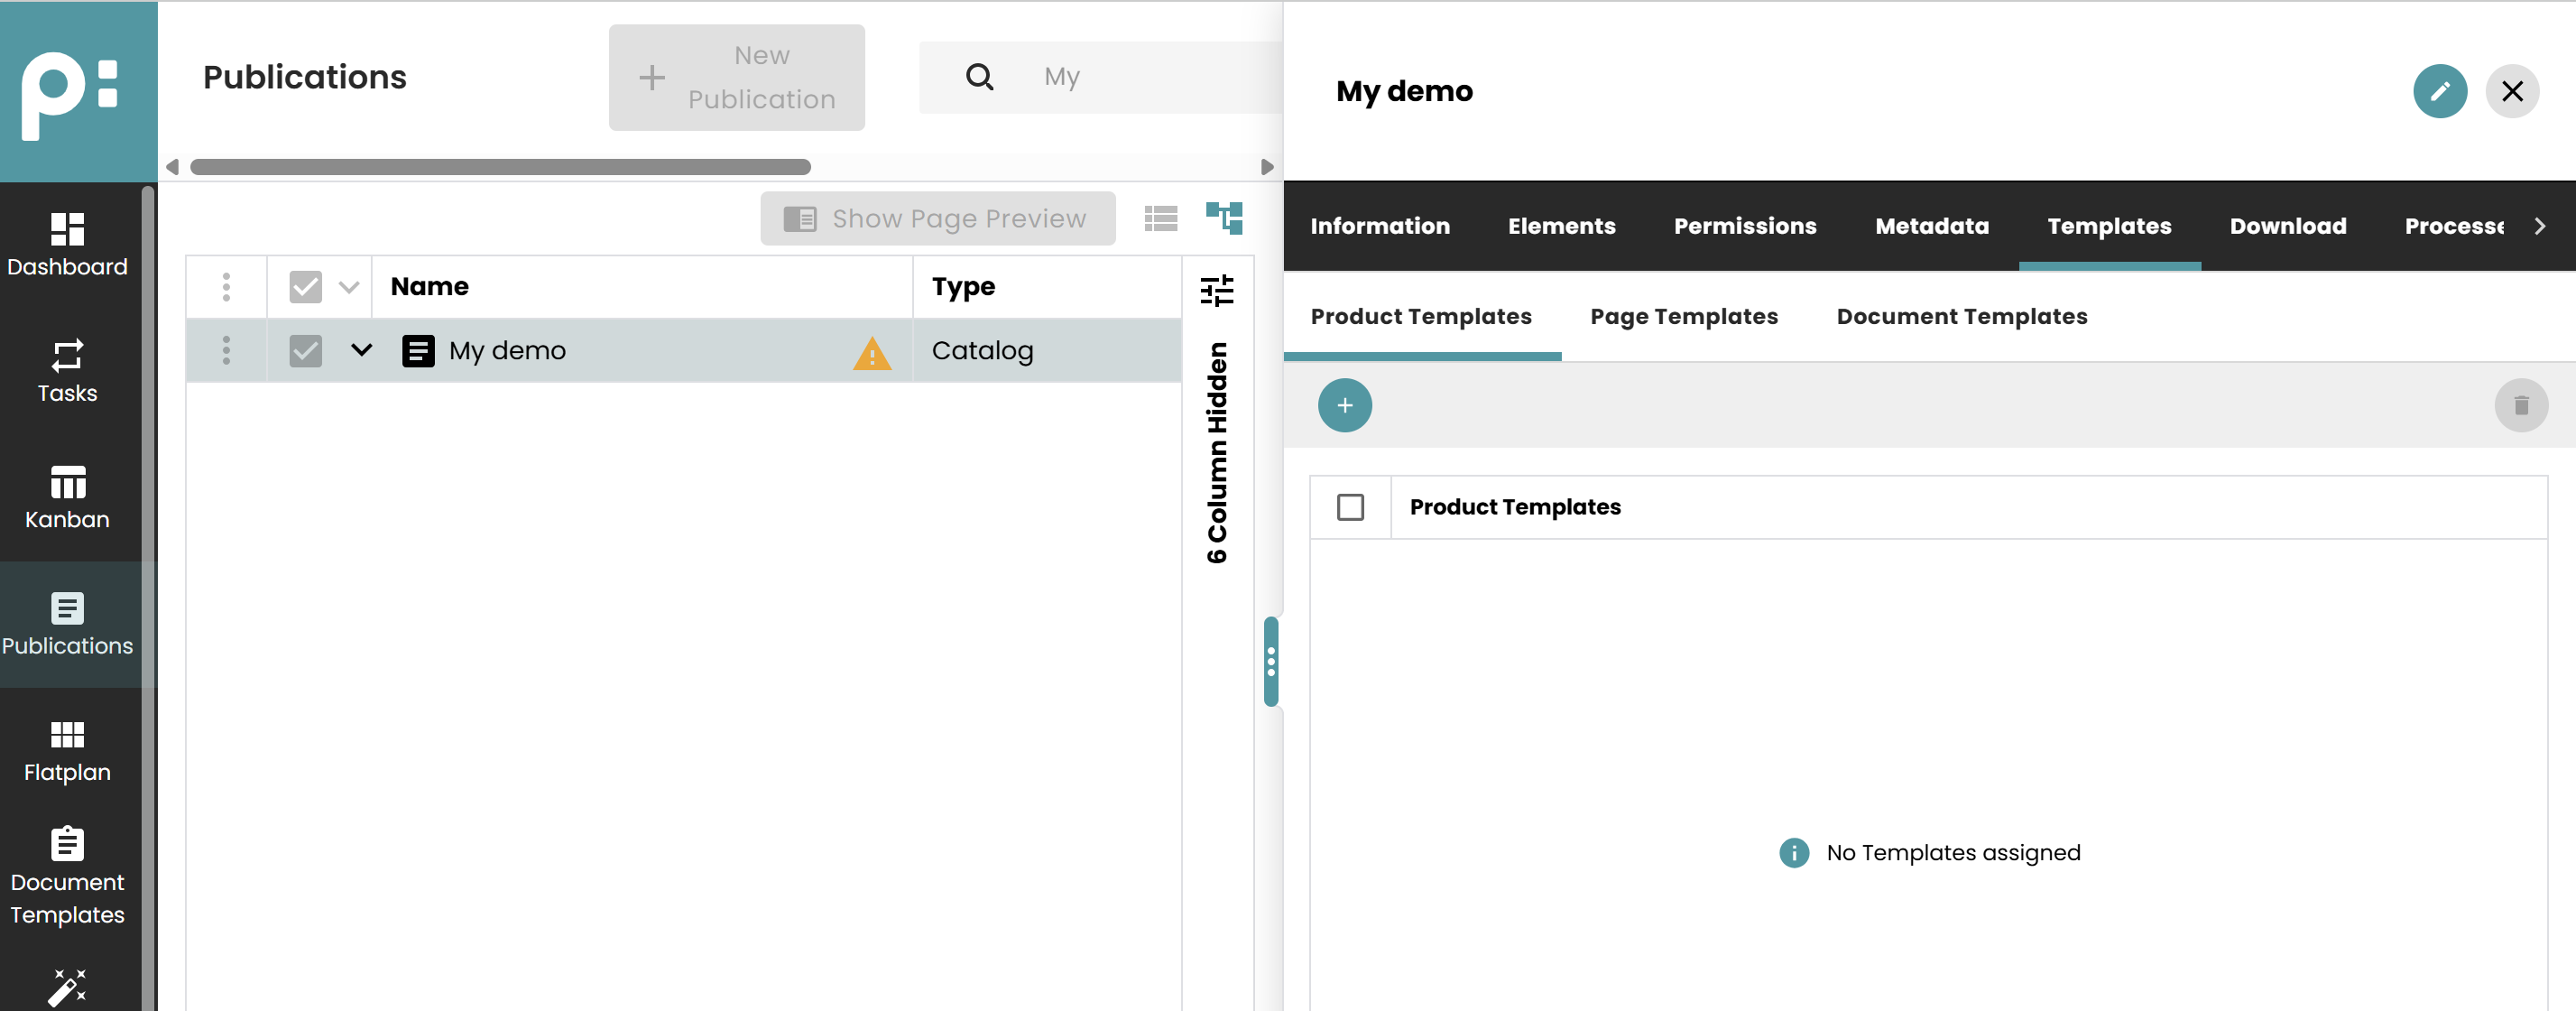
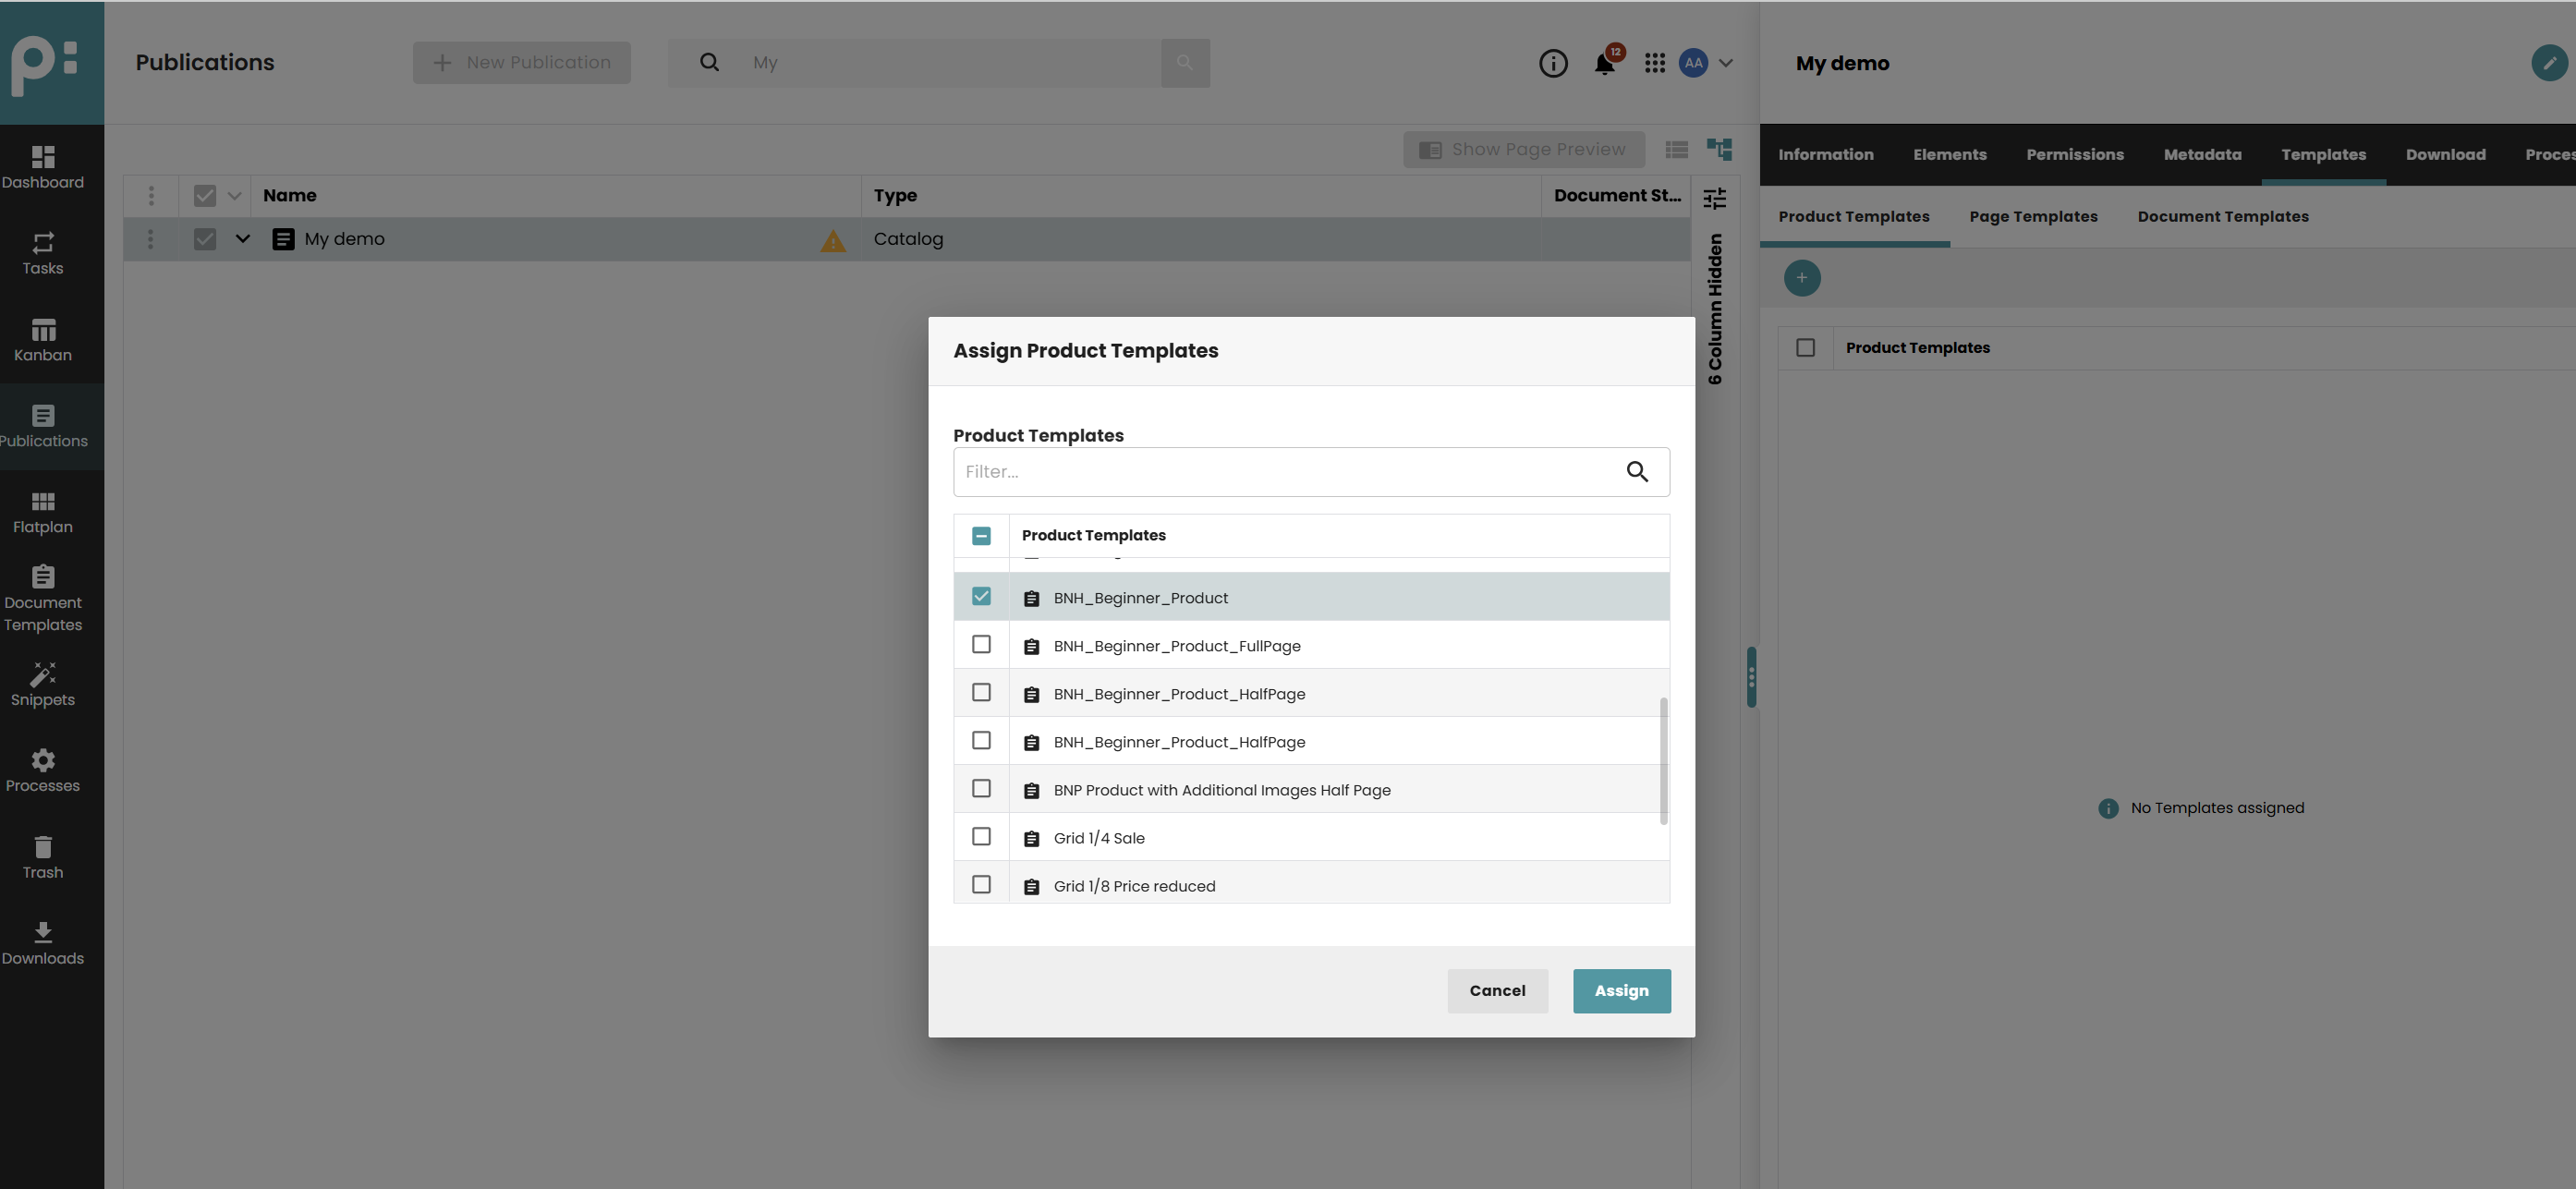
Go to the Templates tab. This section contains three tabs:
-
Product Templates
-
Page Templates
-
Document Templates
-
-
Click the + button to add Product Templates, then click Assign. Repeat this step for Page Templates and Document Templates.
-
Open the Metadata tab to make changes to the required metadata. Follow the Step-by-Step Example that explains each parameter and its values in detail.
- Language (identifier:
_language):eng - Country (identifier:
_country):US - Rendering Rule Set (identifier:
_renderingruleset):Generic
- Language (identifier:
-
After making all required changes to the publication, click Save to apply the changes.
If you want to customize the demo templates or create your own project templates, you can modify the placeholders and layouts used in the InDesign templates we deliver by default.
- To configure the standard placeholders that display attributes, text, or media, refer to the Generic Placeholder documentation.
- To configure the table placeholders, such as displaying product articles in a table, refer to the Table Placeholder documentation.
After the publication has been assigned, you are ready to start planning your products on the document.
Planning and Rendering
The next step is navigating to the priint:planner - Flatplan interface to assign our demo products.
For detailed instructions on planning and rendering using our Product List by Rule AccPack, refer to the example rendering documentation.
Generate the PDF
-
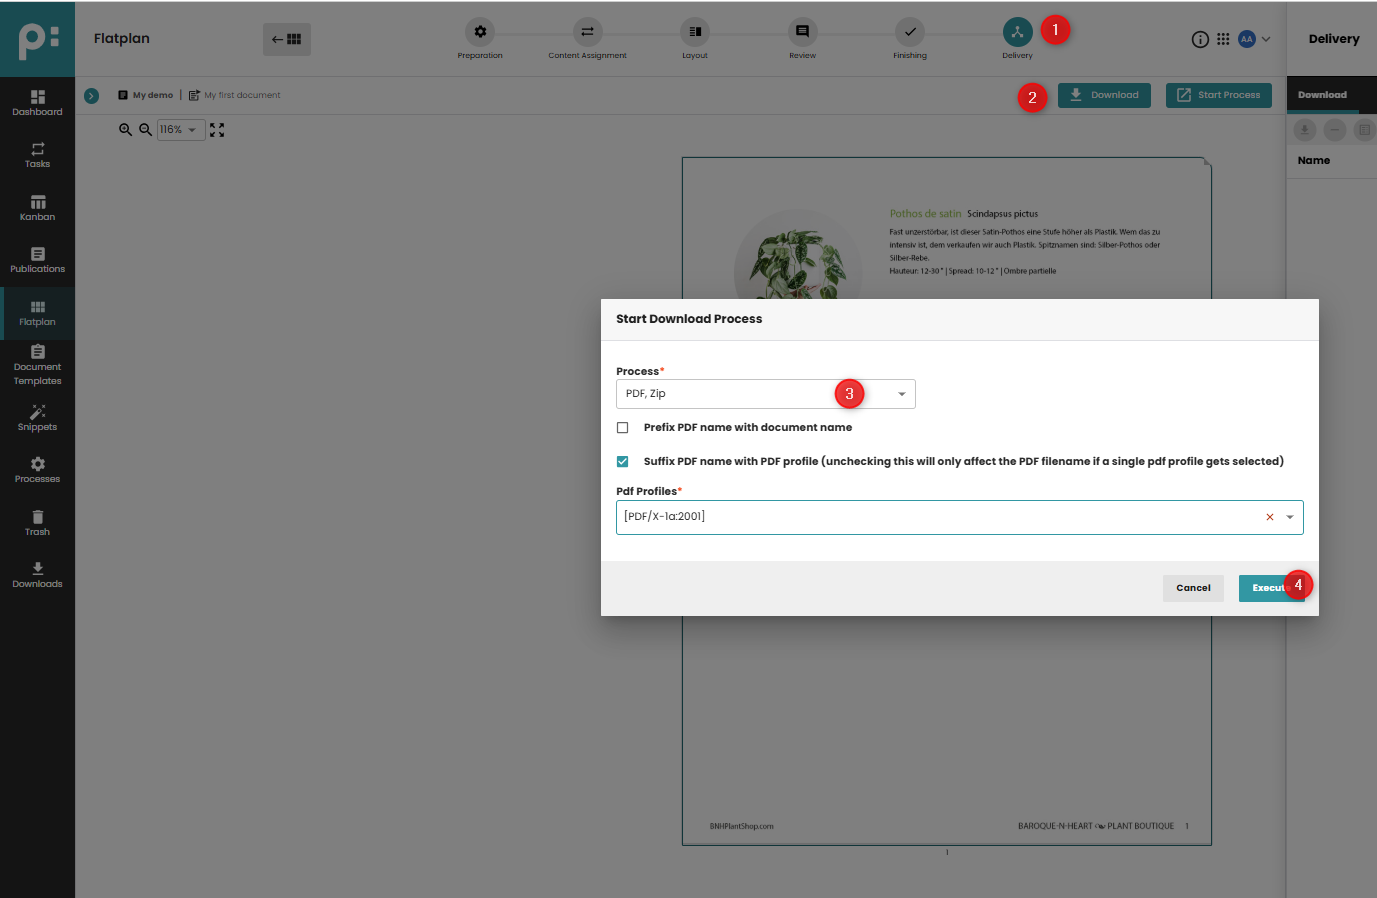
Open the Delivery step.
-
Click Download.
-
Select the PDF, Zip process, choose a PDF profile, and click Execute.
-
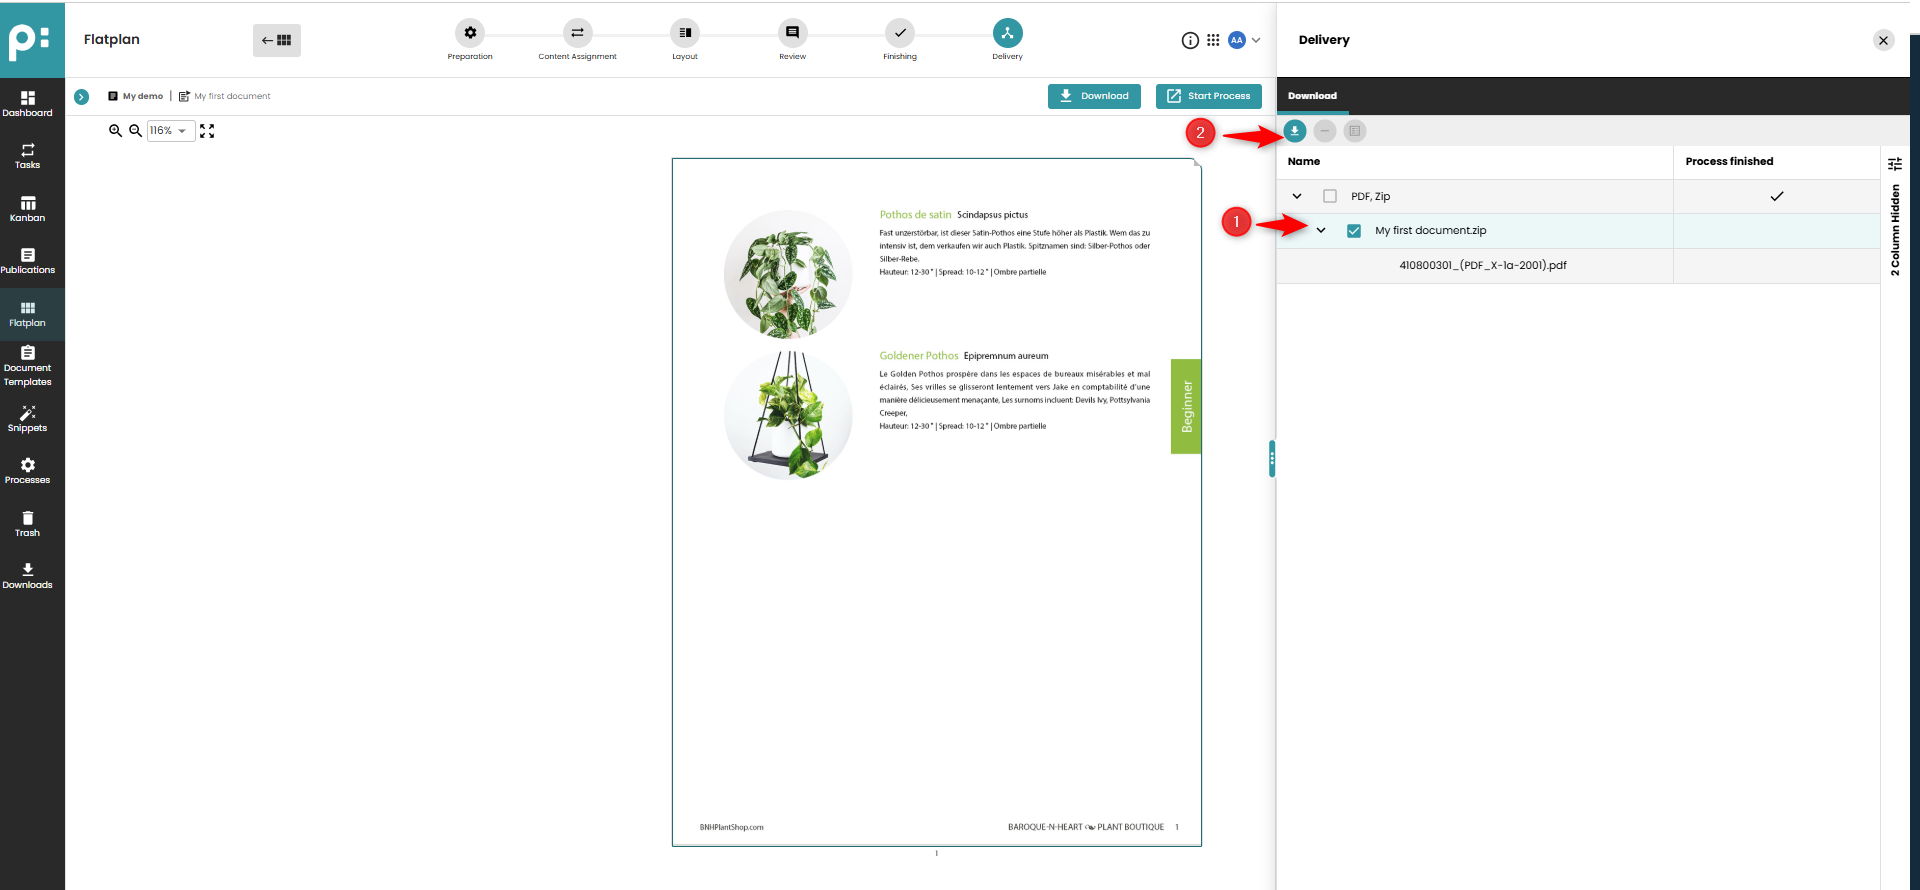
When the process is complete, open the Download tab and download the generated ZIP file.
-
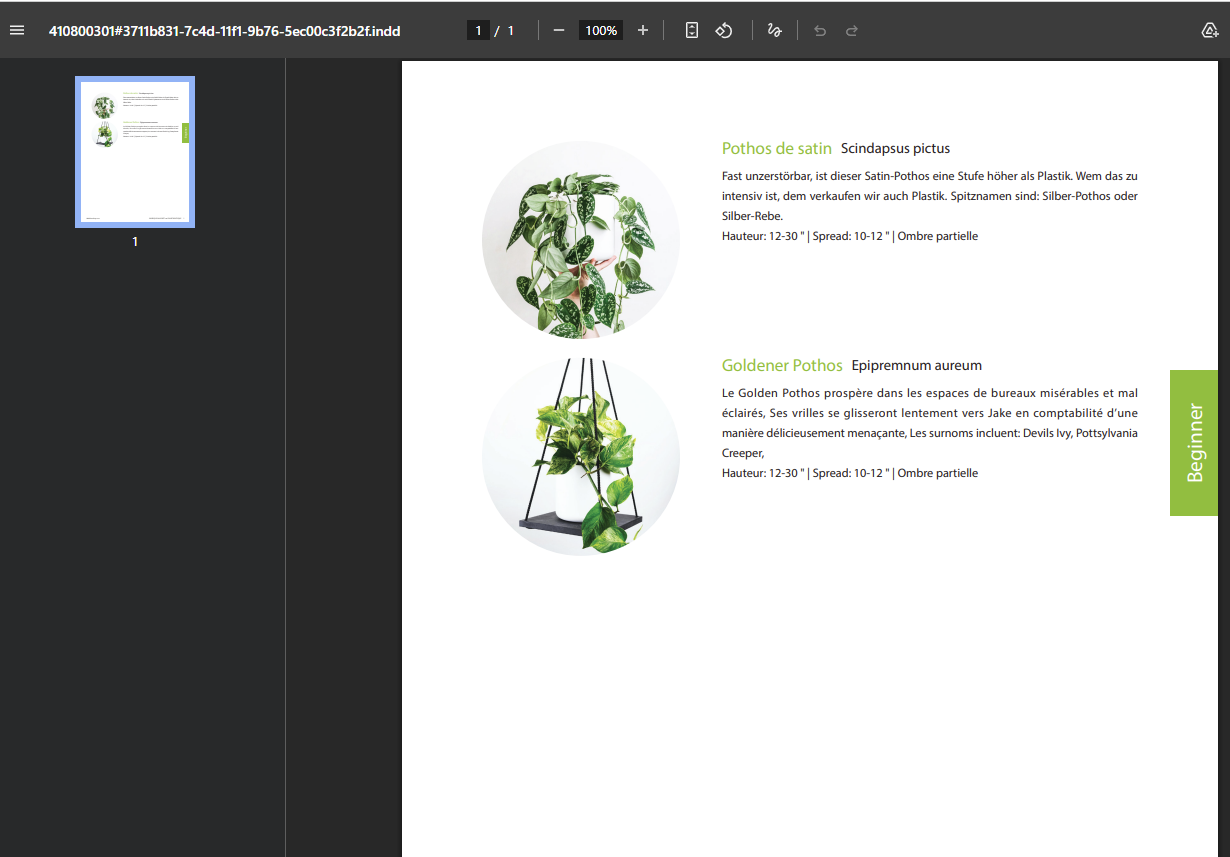
Extract the ZIP file on your local machine and see the final result.

Troubleshooting
If something does not work as expected, check the following:
- Did you follow all the steps in the Installation Guide?
- Are all required services running correctly? For example, verify that the Object Storage, priint-bpm service, and Rendering Service are available and functioning as expected.
- Was the document template imported successfully?
- Are all required page templates and templates available?
- Review the render job status and any error messages in the priint:planner Tasks section.
- Check the server logs if the rendering process fails.